The Mego Cave is officially under way! Wondering what the heck a Mego Cave is? Well, it started during Design Night a few weeks ago. Eric and I were having our Saturday date night in front of HGTV watching Design Night. Seriously, call us lame, but it is a favorite for us. So the new and delightful show Mom Caves was playing. All of a sudden Eric goes, “Why don’t you make the carport room your Mom Cave?” Ding ding ding! Light bulbs are just popping everywhere! That crazy, almost useless room immediately had purpose and potential. I think I shot off of the couch and did a little wiggle dance. I knew I married this man for a reason. Then, after calling it a Mom Cave for a few days I realized how silly it was since I am not a mom (if you don’t count the stuffed animals) so we changed the name to The Mego Cave. So much better, don’t you think?
Ever since that moment, I have been in a flurry of excitement planning my new room that is all mine. That means it can be completely sparkly and girly, but in a grown-up way and not a teeny bopper sort of way (much, I’m still a teeny bopper sometimes). As I was thinking of colors and design, I new immediately the inspiration for the room. It started with a fabric piece my mother-in-law gave me. You can see it right here on the couch where it goes perfectly with the couch.
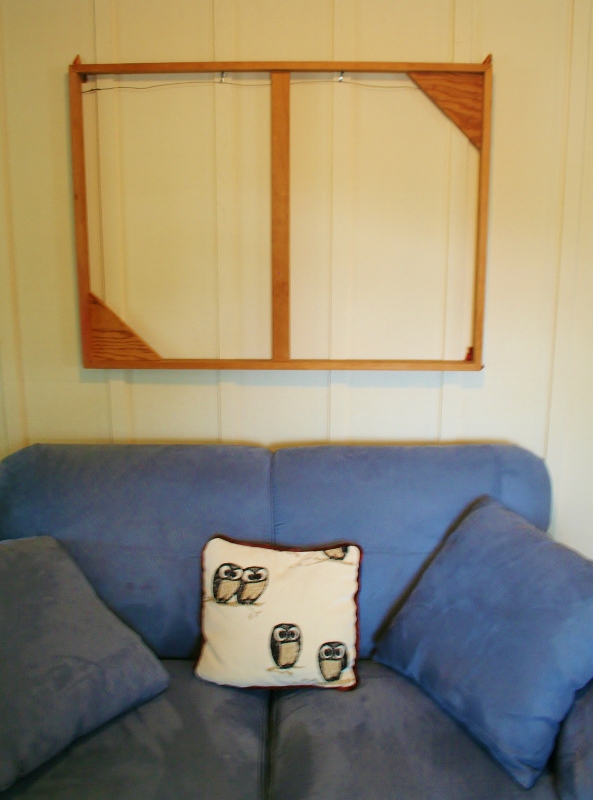
You can also see that above the couch the picture was not gelling with my style or vision of the Mego Cave. Although it is a beautiful picture given to me by my friend Cait’s mom, it wasn’t in the right place. Eric eagerly snapped it up for the basement since that boy loves everything snow!
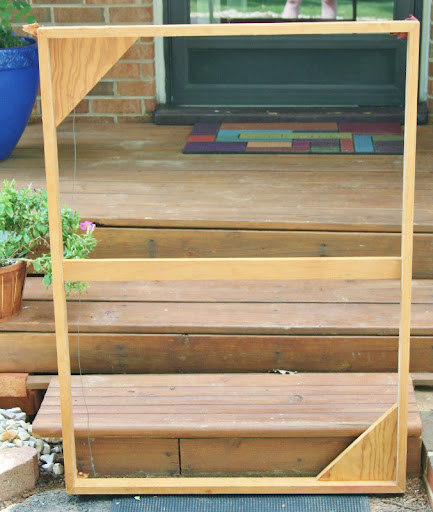
Since the fabric was the inspiration piece, I thought it would be fitting to make it a showpiece by making it a huge piece of artwork above the couch. The space is between two closets and I really felt it could handle a large piece of artwork. My goal was to build a wooden frame that I could stretch the fabric around. Then I thought about how I could work smarter, not harder (can I get an amen?!). So my thought process moved on to just finding a big ole second hand frame. One weekend I went to Estate Specialists who has really nice items upstairs and then a really exciting and smelly basement where you can find stuff if you dig. I did know that they actually have a cage of old frames so off I went to dig around in the dirty basement cage. What a find I got – a step up from even a frame. Check out this $5 find!
Duh! Why didn’t I think of that before?! A canvas stretcher! I hadn’t really measured the space and just left it up to eye ballin’ it in the store. So I eagerly ran into the carport room Mego Cave when I got home to try it spacially.
Perfect! So after a little gussying up (sure was dirty in that basement) it was time to work on finding the perfect pattern to stretch across the frame. Easier said than done. This pattern can easily be so symmetrical, predictable and well, it can kind of look like body parts when it gets all straight and centered. Use your imagination. I worked on all sorts of ways to lay the fabric. It actually took quite a long time for me, as I would lay it out, step back and ponder it for a while. After a few hours of pondering and just a few minutes of actual work, I hit upon my pattern.
One side stapled and a few more to go. I recommend starting with the top and bottom, getting the fabric stretched tight in the frame. If you just started on the top and then the sides, it may bunch up easily. Also, I made clean corners by wrapping them like a Christmas present. Here is its backside all stapled, trimmed, and ready to hang!
Since I got lucky and the canvas stretcher already had a wire on the back for hanging, all I had left to do was to hang it. Drum roll please!
Perfect! Love It! Couldn’t be happier! It just immediately brightens up the room and sets the mood for the new Mego Cave.
And now a before and after for the full effect!
How’s that for a $5 project! So have you ever made fabric into artwork? How have you handled it? Inside frames? Wrapped around something else? I would love to hear your ideas since this one was so easy, I might want to do a few varieties of fabric artwork!


I like your fabric creation WAYYY better than my mom's painting in that space. I can't wait to see the Mego Cave! 😀
Phew! I have gotten the family blessing on moving it. 🙂 It does fit a little better I think. Yeah man, the Mego Cave is going to rock!
thanks for sharing.
[…] room into my Mego Cave. You can see its progress when I began making it over by starting with this fabric artwork project, then got this steal of an antique door desk, and changed around the layout. When I got the new, […]
[…] the idea that we should make the carport room into a Mego Cave. So it began with this fabric art project, my new super-awesome door/desk, and then with this new layout that was just pleading for a nice […]
[…] to take you on the journey thus far, we have had the original carport room tour, the inspiration fabric artwork project to take us into the Mego Cave design project, and then the door to desk to really set the […]
[…] called prior to the Mego Cave) here and then when I began the evolution of the Mego Cave through this fabric art project, setting the tone of the room. That wasn’t too much though to call a Mego […]
[…] random carport room became the Mego Cave, and I began adding lots of pretty little things like this fabric artwork piece, this electric blue free chair, and a super cool door/desk. Things were looking so pretty against […]
[…] patterns starting to emerge (hello new rug and Roman shades made from mini-blinds, along with the crazy fabric artwork). I had a few samples of grey paint, so I thought that was a good place to […]
[…] Hung large scale map, custom framing using a floating frame, fabric artwork, mini-gallery wall with custom heart […]
[…] buying it or making it. Both have their place. Like when I bought this map for a steal, made this large scale fabric artwork, created art from magazines, got custom framing done, or did it myself with a floating frame, to […]
[…] You might have guessed in this artwork post that I had something up my sleeve, er rather up my wall. I was up to mischief in my favorite room of the house, my Mego Cave. This room has come a long way in just under a year, and I think this project is one of its crowning projects. You might remember the wall above the love seat when I did one of my first projects for the room making some fabric artwork. […]