So I couldn’t help but give a small tease in the last post about the guest room tour. I wrote that post in my just finished painting the room glory – completely spattered with paint and a little loopy from the fumes. Ahh, that’s the way to do it. So I put out a bunch of teasers for a pretty subtle change actually. Hope it doesn’t let you down and the pictures show the difference.
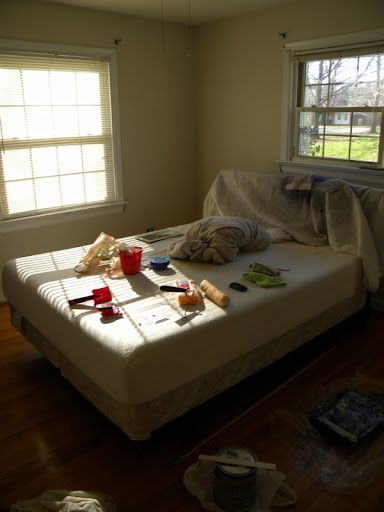
So it all started Saturday morning. Eric was going to be gone all day on Saturday so it was the time to buckle down to work and get the room painted! The night before we had moved all the furniture out of the room. Now I just needed to get all of my tools in place and taping off a few places.
This taping job was me being lazy. I didn’t want to unscrew the curtain rod hangers in fear paint would get in them, blah blah blah. Me being lazy.
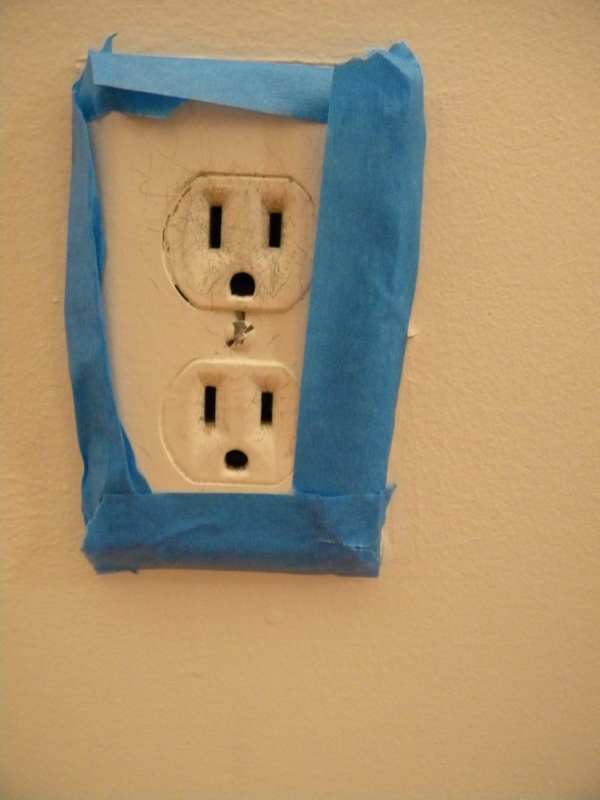
These were not me being lazy. The glory of living in an older home is finding things about its previous owners. They are famous for being even lazier than me and painting over all the outlets, not only cementing them to the wall but also clogging some of the plug holes. So after trying to get these off the wall, I turned to my tape and said heck with it. There they stayed.
They also make a few great tools to make the process go by faster, if you aren’t a pro who doesn’t tape or need any special tools except for their brush. The edger and corner tools eliminate almost all taping and unevenness in painting.
Now I was all ready to go. I like to do all the edging and detail work. That is the most time consuming. Here it is with the first coat.
Then it was time for the walls, where you get the first exciting moment of great impact! Here is a shot to show the contract. It is subtle, but so nice and bright.
Here it is with the first coat done. Looking a little splotchy, but that is why I always go with two coats. Even if you buy the “special” paint that guarantees only one coat. I think they lie.


[…] for being a little overpriced, you can still find some great bargains (like the side tables in our guest room I got for $25 for the pair!). They had some knick knacks but I was a little knick knacked out, so I […]
[…] what I experienced a “paint emergency” inthe basement? Then my just “ok” reaction to the guest bedroom color? Then I have also had a few huge successes where I just want to hug the paint color (like the […]
[…] color has actually made an appearance in our house already in the main guest bedroom. We wanted a nice neutral in that room so we picked Valspar’s Riviera Dune. [Sidenote: […]
[…] Guest Bedroom #1 […]
[…] Guest Bedroom #1 […]
[…] colors book. With that being said, I decided that it was time to bring a little kazaam into our guest bedroom. It is a very nice room that is a calming place for guests to say, but it did need a little […]
[…] across from the bedroom (which is what we are doing today!) to the guest room to show a before and after with a fresh coat of paint. So now we will back up to the 3rd […]
[…] up, the exciting world of vents! The vents in the guest bedroom and basement were painted the old yellow color that the entire house was painted pre-Rapps. They […]
[…] This paint color was totally different on the paint chip!” Hello basement and a little bit of the guest bedroom. So take the time to buy the $3 paint samples and dab them around the room. I actually did a whole […]
[…] Painted the walls […]