Hey all you lovely people! I am so excited to introduce you to the first ever guest post to be here on Rappsody in Rooms. You’ve heard me talk about my friend Paula a few times around here and today I am turning over the blogging reins to her. Both her and her husband are so good making projects – especially building things from scratch – which I am always impressed with. Armed with their vast knowledge, creativity, and tools, here Paula is to teach you an awesome tip of the trade when you get to woodworking.
How to Draw Parallel Lines on Wood Guest Post by virginiasweetpea.com

Hello, Rappsody in Rooms readers, I’m Paula from Sweet Pea. I’m a 6th grade teacher by day and in my free time enjoy both blogging and being active. I love to run, bike, play tennis, and go to the gym. When I’m not teaching or sweating, I blog about DIY, crafting, decorating, cooking, gardening, and travel.

My husband enjoys woodworking and in recent years I’ve enjoyed joining him in the workroom for projects. Slowly but surely he is teaching me woodworking techniques and some of the tricks of the trade.

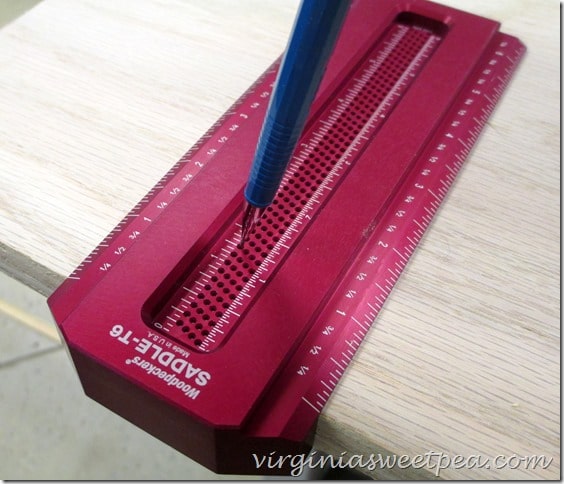
Most men love gadgets and my husband is no exception. Over the years he has accumulated many tools that save time when woodworking. One such tool is a Saddle T Square made in the USA by Woodpeckers. (I have no affiliation with Woodpeckers but do like supporting made in the USA products.)

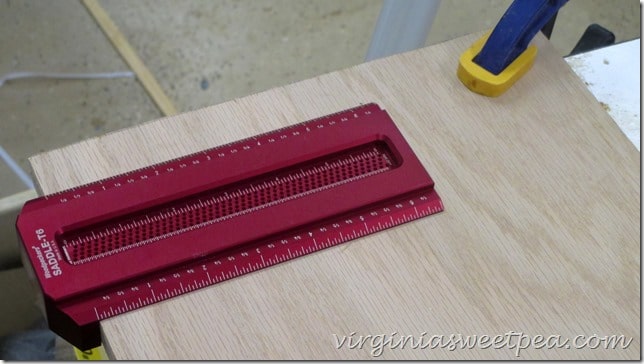
Let me show you how easy it is to draw a line parallel with a board’s edge with a Saddle T Square. Start by clamping the board to your work surface. You don’t want it to slide while you are marking the line.

How to use the Woodpecker Saddle-T6

Note that each outside edge of the tool is marked in 1/16” increments. The 30 degree bevel helps to draw a perfect perpendicular line, another great use for this tool.

Insert the tip of the pencil in the hole that aligns with the measurement that you want the line parallel to the board to me. My pencil is in the 1 1/2” hole which will make a line 1 1/2” from the edge of the wood.

Helpful Woodworking Tool

Slide the square along the board’s edge to create a perfectly parallel straight line. This is a lot faster than measuring two points with a tape measure and connecting them with a line that may or may not be parallel to the board’s edge.

How to use the Woodpecker Saddle-T6 to draw a parallel line on wood

My sample line is exactly 1 1/2” from the board’s edge.

How to draw a line parallel with the edge of wood

Many thanks to Megan for inviting me to guest post. I would love it if you would drop by to visit me at Sweet Pea or connect with me on Facebook, Pinterest, Google +, or Twitter.

  • Thank you so much for allowing me to guest post on your blog, Megan. It’s great to be here.ReplyCancel

  • LOVE this! This is one of the things I struggle with–drawing straight lines. So to find tools that help me to do it better??–PERFECT! Thanks, Paula!!

    Serena @ Thrift DivingReplyCancel

    • I agree! Go Paula for finding a way to do this and to explain it to us in such an easy to understand manner!ReplyCancel

Sometimes fall decor and I don’t jive.

Whaaaaat?!?! You may ask. Well don’t freak out too much. It is just because I am always so sad to let go of the bright, bold summer colors of summer for warmer and more traditional tones and decor.

So I don’t. I do a more modern take on fall. I do that by mixing the colors I love with fall elements. It’s taking me and inserting fall into my decor instead of fall inserting itself into my decor. Got it?

I also don’t like spending a ton of fall decor (as you can tell by my acorn jack o’lanterns, plaster leaves and gourds, and sweater vases) so I like to use elements that are free – and from nature! I made three different crafts from pinecones and branches that I collected from the yard (or my work’s yard – same difference).

Dipped Pinecones

Fall Craft Dipped Pinecones | www.rappsodyinrooms.com

Some of the pinecones were still young and hadn’t fanned out yet. I liked the more sleek look of them (although I kind of messed that up, but I’ll show you that in a second). I thought they had a more modern look to them so I decide to give them the paint dipped look.

I just took my sample paints (look for coupons for free ones in magazines) and dipped in the pinecones. Then I just took them out and laid it on wax paper to dry.

Fall Craft Dipped Pinecones | www.rappsodyinrooms.com

This is where I messed up my pinecones’ modern lines. They were taking forever to dry so I put them outside to speed up the process.Duh. The heat makes them dry out and open up. So that happened a little. But I still definitely like them!

Fall Craft Dipped Pinecones | www.rappsodyinrooms.com

Yarn Wrapped Pinecones

Fall Craft Yarn Wrapped Pinecones | www.rappsodyinrooms.com

I also picked up some yarn (’cause cozy yarn definitely makes me think fall) and decided to wrap it around the pinecones (the open ones were perfect for this project). I played around with different colors and patterns and textures of yarn. The fuzzy yarn definitely worked the best.

Fall Craft Yarn Wrapped Pinecones | www.rappsodyinrooms.com

Yarn Wrapped Branches

Fall Craft Yarn Wrapped Branches | www.rappsodyinrooms.com

Lastly I used branches and wrapped those with yarn too. It was easy – tie the yarn in a knot, wrap the branch, and then finish off with another knot.

Fall Craft Yarn Wrapped Branches | www.rappsodyinrooms.com

Now you have bright, modern, and playful fall items that break the traditional fall decor mold but still bring the spirit of autumn into you home (without breaking the bank)!

Let’s wrap this week of fun fall crafts up with a video with a little bit of pep to it. Spoiler alert: I go all double time in this video too.

If you liked the sweater wrapped vases that I told you about earlier this week, then you will definitely want to check out my video tutorial on how to make these sweater wrapped vases. I’ve been living with them all week and love them!

Sweater Wrapped Vases for Fall | www.rappsodyinrooms.com

They would be great gifts to give to teachers, friends, or hostesses. Perhaps a house warming gift filled with goodies? Just some ideas…

So let’s take a watch on how to make sweater wrapped vases!

Behind the scenes:

  • I finished filming this gem on Labor Day – another blazing hot day just in time for …. September?
  • Eric’s Dad came over to the house to work in the yard (not asked for – he does it for fun!!) and might have thought me a wee bit crazy if he heard me talking to myself in the house. But then again, he’s known me for a while so he probably already knows that I am indeed a little bit crazy.
  • I didn’t do anything to my hair except wash it and let it dry and methinks it turned out good on its own — which never happens.

Happy fall crafting this weekend! May the force fall be with you! <—nerd alert!

PS – For more fun fall crafts don’t forget to check out my plaster covered fall items and pumpkin painted acorns.

Anyone else ready for the slight chill that makes you grab for a sweater for the first time in months? I am all about soft, cozy knits that seem to hug you with their snuggliness. Cause who doesn’t love the snuggles?

Since I like that feeling so much, why wouldn’t my décor, right?

I decided to give my glass vases the snuggle treatment with their own cozy sweater.

Sweater Wrapped Vases for Fall | www.rappsodyinrooms.com

This is one of those insanely easy projects.

How to Make Sweater Wrapped Vases and Glass Containers

Step 1: Grab some old sweaters you aren’t afraid to take some scissors too. This is a great way to recycle those seen-better-days sweaters. Or if you are still holding on to all of yours, hit up a thrift store.

When looking for sweaters look for chunky knit sweaters with interesting cabling and details.

Sweater Wrapped Vases for Fall | www.rappsodyinrooms.com

Step 2: Gather all the glass jars, vases, and containers you have.

Sweater Wrapped Vases for Fall | www.rappsodyinrooms.com

Step 3: Thread your vase through the sleeve (or turtleneck as I did for this one!). Situate where you want your sleeve/neck to fit on the glass.

Sweater Wrapped Vases for Fall | www.rappsodyinrooms.com

Play with cuffing if you would like. Then snip off the sleeve/neck about one inch below the bottom of the glass container.
Sweater Wrapped Vases for Fall | www.rappsodyinrooms.com
Step 4: Using a knitting needle and yard, sew up the bottom to make it flat.
Sweater Wrapped Vases for Fall | www.rappsodyinrooms.com

Step 5: Fill, decorate and enjoy! Toss some branches into a tall vase for some extra height. Light a candle in another. They look adorable in groupings too!

Sweater Wrapped Vases for Fall | www.rappsodyinrooms.com

Check out my tutorial on how to make the ceramic looking items on the table by dipping cheap plastic fall pieces into plaster of paris!

Let’s just fall back to yesterday (har har) when I showed you how to Plaster of Paris plastic gourds and leaves to create a high-end ceramic look for a fun fall look.

Fall Craft: Plaster of Paris Gourds, Leaves, and Pumpkins | www.rappsodyinroooms.com

I know the words were fun and all to read, but what’s more fun? A video showing you how to do it! Hurray! That’s what we’ve got today!

Here is my latest how to video on how to make plastic gourds, leaves, and pumpkins look like high-end ceramic pieces.

Fun Facts About the Video:

  • I displaced Eric to the basement for lunch. He looked like a circus show (albeit a cute one) trying to take everything down the stairs in one trip.
  • I hogged this space for the entire afternoon and I think I forgot to eat lunch. Anyone else forget to eat when they get really busy?
  • I shot the finished shot the next day. Eh outfit change, right?
  • I opened up the kitchen door to let more sunlight in for the video but it was mind blowing meltingly hot out that it almost roasted me in the kitchen even with the storm door as a barrier. Is that not ironic when I was making a fall craft?!Hope you liked the video! Stay tuned for more fun fall crafts coming!