Welcome back to Pinterest Party week on behalf of Hometalk, Michaels, and myself! Today I am sharing with you my final project plus a link party showcasing the other amazing bloggers participating in this party around the country.

Check out my burlap coasters and beautiful cleaning bottles if you missed my earlier Pinterest Party crafts.

As my final project I chose a simple but oh-so-fun project: a chalkboard banner.

Chalkboard Pendant Banner | www.rappsodyinrooms.com

Yes, I have officially jumped on the pendant banner band wagon. Sigh. But I embrace it because it is chalkboard and I love chalkboard anything (for example, my chalkboard runner and my chalkboard frame sign). Plus, I thought it would be fun to have this fun little pendant welcoming everyone to the party on Sunday.

This pendant kit comes wrapped up in one pretty package.
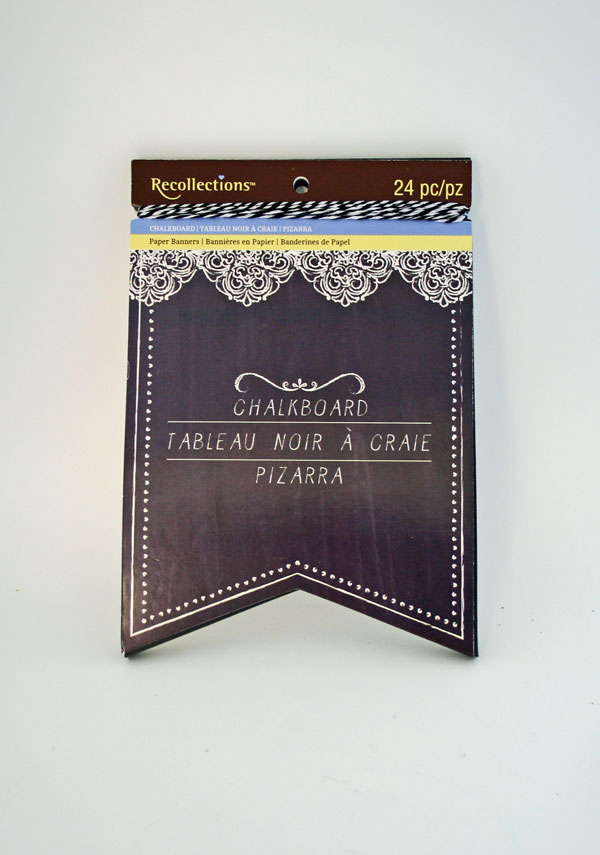
Chalkboard Pendant Banner | www.rappsodyinrooms.com

You just take out the individual pendants by ripping on the perforated line.
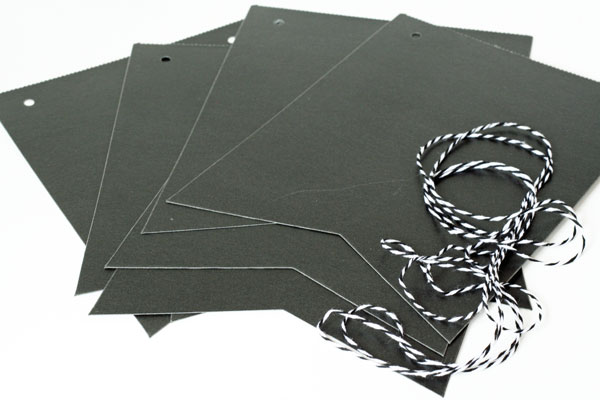
Chalkboard Pendant Banner | www.rappsodyinrooms.com

Then you just use the twine that comes with it to string through the pre-punched holes.

Chalkboard Pendant Banner | www.rappsodyinrooms.com

Thank you for making this craft all fun and minimal effort.

Chalkboard Pendant Banner | www.rappsodyinrooms.com

Write your message or decorate and you’re done!

Chalkboard Pendant Banner | www.rappsodyinrooms.com

I decided a nice welcome would be fun for the mantle – and for the party.

Chalkboard Pendant Banner | www.rappsodyinrooms.comChalkboard Pendant Banner | www.rappsodyinrooms.com

Chalkboard Pendant Banner | www.rappsodyinrooms.com

Chalkboard Pendant Banner | www.rappsodyinrooms.com

Now let’s get to the pre-party: linking up to all the amazing projects that have been floating around the blogosphere in anticipation of the Pinterest Party. Have fun perusing all the different ways these bloggers made the inspiration projects.


Can’t wait to see you on Sunday, February 16th at the Michaels in Lynchburg anytime between 1pm and 4pm.

Email me (rappsodyinrooms @ gmail . com) or leave a comment with any questions!

  • I like how this came as a ready to use kit. I’d buy it if it weren’t too expensive. Do you remember how much it was?ReplyCancel

    • It is such a great kit! I believe it was $9.99 but you better believe I used a coupon!ReplyCancel

  • Hey I know this is off topic but I was wondering if
    you knew of any widgets I could add to my blog that automatically tweet
    my newest twitter updates. I’ve been looking for a plug-in like
    this for quite some time and was hoping maybe you would have some experience with something like this.
    Please let me know if you run into anything. I truly
    enjoy reading your blog and I look forward to your new
    updates.ReplyCancel

Welcome back to another edition of Pinterest Party time in collaboration with Hometalk and Michaels! If you missed Monday make sure to check out my first Pinterest Party project when I made burlap canvas covered coasters. Also, don’t forget I will be at the Lynchburg Michaels on Sunday, February 14th from 1pm – 4pm doing Pinterest inspired crafts like the ones I am sharing this week.

Use-Bottles-for-Household-Uses | www.rappsodyinrooms.com

Today’s craft is a simple and functional with only two elements. Can it get much simpler than that?

It started with these beautiful colored bottles from Michaels. They have the most gorgeous display of them in all sizes, shapes, and colors.

Use-Bottles-for-Household-Uses | www.rappsodyinrooms.com

I like these because they have a secure top – which is a must for this project.

Since I’m trying to streamline my possessions, I like items that provide multi-function. Instead of just having these bottles sit on a shelf and look pretty, I thought they could sit on a shelf, look pretty and word hard.

All it took was two chalkboard labels to whip these bottles into shape.

Use-Bottles-for-Household-Uses | www.rappsodyinrooms.com

One bottle holds my soap for washing dishes. Bye-bye plastic container from the store.

Use-Bottles-for-Household-Uses | www.rappsodyinrooms.com

The other is for a vinegar and water mixture for cleaning. Any beauty and inspiration that can be found in cleaning is a huge help to me since I don’t love the day-to-day cleaning tasks.

Use-Bottles-for-Household-Uses | www.rappsodyinrooms.com

So there you are – two bottles + two chalkboard labels = beautiful cleaning storage!

How would you use these beautiful glass bottles?

Pinterest. The Mecca of the DIY and decorating world. But how much do you pin compared to how much do you actually do? If you need a little nudge into the actually doing of your Pinterest projects, Hometalk (the largest home and garden social media network), Michaels, and I are here to help!

On February 16 from 1pm – 4pm Michaels and Hometalk will sponsor Pinterest crafting parties across the country. Over 100 hundred bloggers will be in store to do Pinterest projects with you – including me! I’ll be at the Lynchburg Michaels this upcoming Sunday from 1pm – 4pm. This week I will be sharing the not one, not two, but three projects I will be doing in store!

Michaels and Hometalk Pinterest Pary | www.rappsodyinrooms.com

To make it easy to craft with me, just come in to the store anytime between 1pm and 4pm, pick up your craft supplies from the Pinterest displays in store, and head to the party room! We can get crafty together!

The first project I am sharing with you this week is burlap canvas coasters.

Burlap Wrapped Canvases Turned Coasters | www.rappsodyinrooms.com

I grabbed a couple of sets of these coaster sized burlap covered canvases.

Burlap Wrapped Canvases Turned Coasters | www.rappsodyinrooms.com

I decided to try out three different ways of decorating the coasters.

1. Spray Paint Stenciling: First up was this neat spray paint and stencil I found in store.

Burlap Wrapped Canvases Turned Coasters | www.rappsodyinrooms.com

It was so easy. I just set the stencil over the canvas and sprayed a nice even coat of paint over the stencil.

Burlap Wrapped Canvases Turned Coasters | www.rappsodyinrooms.com

Then, just take off the stencil! Make sure not to over saturate the canvas or you may have some bleeding.

Burlap Wrapped Canvases Turned Coasters | www.rappsodyinrooms.com

2. Traditional Stenciling: Next I decided to use a traditional stencil and a beautiful rose gold paint. I wanted it to be a subtle pattern with shimmer.

Burlap Wrapped Canvases Turned Coasters | www.rappsodyinrooms.comBurlap Wrapped Canvases Turned Coasters | www.rappsodyinrooms.com

This is my favorite coaster, I must say. I love the way it shimmers and shines!

Burlap Wrapped Canvases Turned Coasters | www.rappsodyinrooms.com

3. Stamping Coasters: Lastly, I tried stamping. I found this self stamper with great little stamps and messages. The black showed up well on the canvas. It was fun to make more personalized messages on this coaster.

Burlap Wrapped Canvases Turned Coasters | www.rappsodyinrooms.com

Burlap Wrapped Canvases Turned Coasters | www.rappsodyinrooms.com

If you want to seal the canvas if you’re afraid of the water ruining the coaster, just put a coat of Mod Podge over it to make it water proof.

Burlap Wrapped Canvases Turned Coasters | www.rappsodyinrooms.com

Remember, you can make your own canvas coasters with me (or other Pinterest crafts) at the Lynchburg Michaels this Saturday from 1pm to 4pm. I hope to see you there!

As a bonus, the first 25 people to come will get great chalkboard cards for FREE!

Plus, an $100 gift card is up for grabs! Follow Michaels on Hometalk to enter to win a $100 Michaels gift card. Five winners will be announced on Hometalk’s Facebook page on February 17th, after the party.

Michaels-hometalk-giveawaySharing this post here:

Happy Friday everyone! I’m so excited to share with you a fun little project I’ve been doing in conjunction with Hometalk. You may remember me mentioning them before when I did this Gorgeously Gilded Craft roundup for them last year, and I’m so pleased to say we’ve expanded our relationship.

Hometalk is an awesome social media network for all your home and garden needs. It is the largest home and garden social media network out there – and for good reason too. They have tons of projects that talented members post, plus you can ask questions and get really helpful answers.

When they approached me asking if I wanted to partner with them for a TV segment for Valentines Day, I jumped at the chance. That is how the DIY Valentines Tablescape was born and then pitched out to my local TV stations.

Thankfully our local station WSLS (NBC) has a great afternoon show called Daytime Blue Ridge that liked my project and invited me to join them this past Thursday to do a five minute TV segment.

Hometalk and WSLS TV Segment for Valentines Day | www.rappsodyinrooms.com

On the set of Daytime Blue Ridge!

The two hosts, Natalie and Jamie, were so fun to work with. They put me completely at ease, made me laugh, and were so excited about my project. We had a great time just chatting and crafting that I forgot we were even on TV.

Enough chit-chat – let’s get to watching!

Yikes! That was a blast! Aren’t those two women the best? Their enthusiasm was so catching. I could do that with them every day.

I also thought it would be fun to share a few behind the scenes pictures that I snapped on my phone while waiting.

Hometalk and WSLS TV Segment for Valentines Day | www.rappsodyinrooms.comI was instructed to get to the studio a half hour before the show started at noon to allow me time to prep for my segment. This included me setting up parts of my table. I was instructed to leave off everything breakable since it would have to be moved to where we would actually film the segment later.

Hometalk and WSLS TV Segment for Valentines Day | www.rappsodyinrooms.com

I had everything set-up as much as I could before moving the table. The table was set-up in a place where they film different shows and news. The red chairs you see in this picture was where we were actually going to be filming. They move around the studio for different segments and move furniture between every segment as well. I’ve never seen people use two minutes so well!

Hometalk and WSLS TV Segment for Valentines Day | www.rappsodyinrooms.comThis part of the studio is where most of the show was filmed. Isn’t a cozy little corner? The windows were at street level so it was fun that you could see people behind them while they filmed.

Hometalk and WSLS TV Segment for Valentines Day | www.rappsodyinrooms.comThey did the cutest Olympic themed crafts with kids segment in front of the green screen  (a snow scene was actually seen on camera behind them). Then it was my turn so I turned from behind the camera to in front of the camera!

Well, there is my video debut for Hometalk my friends! Thanks for sharing in my fun five minutes of local TV fame!

I’m into month two of being a guest contributor over at the fabulous blog Teal & Lime. My series is called Craft Tips and Tricks, and I’m really excited about where this series is going.

Last month I went over how to stock your craft arsenal so you are ready to craft at any time. This month I’m talking about creative storage options for all those craft supplies. I’m not just talking about any storage though – I’m talking about craft storage in plain sight.

Intrigued? Read on at Teal & Lime

Creative Craft Storage Solutions in Plain Sight | www.rappsodyinrooms.com

Also, check out my series page on Teal & Lime. Isn’t that cool? I have my own page on her site (as do her other wonderful contributors)!

Also, in unrelated but nevertheless exciting news, I’m making my DIY television debut on Thursday, February 6th on our local channel WSLS (Channel 10). I will be on at noon in partnership with Hometalk, the largest home and garden social media network, to share my DIY Valentines Day romantic dinner table setting. I’ll be sharing the video here afterwards, but I would love some local support if you can! It will be live so it will be worth the watch.

Also, I’ll be sharing some pics of the journey so make sure to follow me on Instagram and Facebook for real-time updates!