Happy Friday everyone! Hope you all have had a great week and are going to have an even better weekend! I know I am excited to open the FOUR cans of paint that I bought yesterday. Yup, four paint cans and one wall. That’s enough teaser for next week though.

Anyways, the real reason for this post is to talk about my complete site redesign! Email readers, please make sure to click through so you can see it. First of all, I want to thank everyone reading this right now. It is because of you that my blog has grownup so much through these 1.8ish years that I have been blogging.

It all started at The Mego Blog (ha! It’s crazy to look at that first post!).

the-mego-blog-print-screen-2-640x430.jpg

Then after a few months I really found my direction in this blogging world. I knew I wanted my blog to be more focused on Eric and my house renovations and all the fun DIY projects that I was getting braver and braver to try to accomplish. My love for blogging was expanding too. I always knew this was a magical combination for me – writing, photography, and house projects. I was also able to share and maybe even help people.

This is when Rappsody in Rooms began.
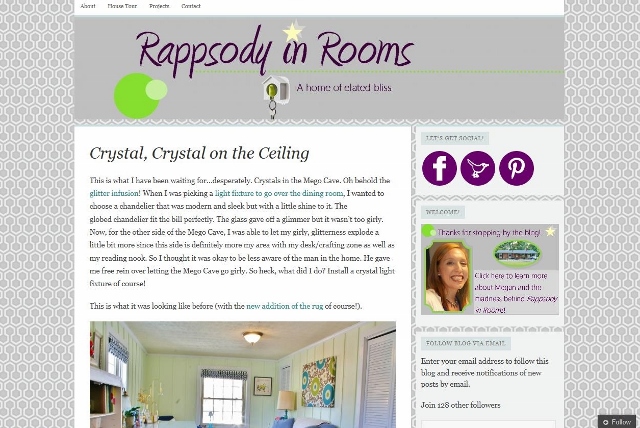
blog-print-screen-2-640x428.jpg

I loved that the name was a pun (which is soo me) ,and I loved that you could branch off the name with another pun-ish statement, playing with opening doors.

Which is where I came up with my tagline as of today “Opening doors to inspired living.”

Now, we are here, at another milestone for this little blog that has stolen my heart. The art of blogging and the bloggers in my niche create this little bubble of blogging happiness. Here is my new blog design which looks so sophisticated and beautiful on the screen and also boasts a complete transition behind the scenes to self-hosting and unlimited opportunities.

rappsody-in-rooms-new-site-design

This week has been my “soft opening” of my blog design. I’ve been working through some issues in getting the new site up and running, but I think I’m there. Of course I will always be tweaking the site, but at this present moment I just love to open the site up in a window and gaze at it.

So please, take a look around, leave me a note on anything you love or anything that’s not working for you. I’m always open to suggestions. I would also encourage you to check out my “About Me” page that I have updated. It feels so much more me now, with more jokes, stories, information, and pictures.

Thanks everyone for reading this post, allowing me to ramble and go a little gah-gah over my new site design, and basically just tell you thank you for being here. Cause I really mean it. You rock. Now go one with your bad self and have a great weekend!

  • Megan, your site looks SO good! I just checked out your about page, and we are totally wedding date twinsies! Marty and I also got married on 4/17/10! Your wedding photos are beautiful and I think my favorite is the one of your dad jumping :).ReplyCancel

    • That’s so cool Jena!! Wedding twins! Isn’t that picture of my dad hilarious?! I love that I didn’t even know it happened until I got the pictures back.ReplyCancel

I’ve finally finished a project that I have been percolating on for months and months. It wasn’t procrastination this time; it was brainstorming (I promise). It was this little $8 bentwood footstool that I picked up at a local thrift store earlier this summer.

bentwood-footstool-makeoverbentwood-footstool-makeover

bentwood-footstool-makeover

I knew it was going to be for the sun room for a place for your feet to lounge in either the super comfy loveseat or (purely accidental yet oh-so-perfect) matching bentwood rocker. Then, after reading this makeover at Vintage Revivals of the exact same type of bentwood footstool, I knew what to do (thanks Mandi for the inspiration).

First, I took the stool base down to a crisp white, leaving the top natural.

http://www.vintagerevivals.com/2013/10/thread-wrapped-stool.html

bentwood-footstool-makeover

bentwood-footstool-makeover

bentwood-footstool-makeover

bentwood-footstool-makeover

After it was all white and dry, I realized I wanted the top to have a bit more shine to it. So I grabbed my gold leaf rub ‘n buff and gilded the entire top. All I did was put a little bit on my finger and gently rub it into the top. I found it got into the crevices best this way. It is a subtle difference but you can see how it is gold and glimmery on the right and au naturale on the left. I love the gold and glimmery side myself.

bentwood-footstool-makeover

bentwood-footstool-makeover

bentwood-footstool-makeover

bentwood-footstool-makeover

After attaching it all back together, I pulled in some embroidery thread that I had bought at Michael’s for a couple of bucks. I tried to mimic the color scheme of the room that I had planned.

bentwood-footstool-makeover

Basically all you do for this step is wrap the thread around the legs. Tie a knot, wrap it the width you want, and then tie another knot. You can either do all different patterns or the same. I decided to have the two sides that butt up to each other have the same pattern but make it slightly different on each corner.

bentwood-footstool-makeover

Get ready to do this task while watching a movie or something. It takes surprisingly long.

bentwood-footstool-makeover

bentwood-footstool-makeover

bentwood-footstool-makeover

bentwood-footstool-makeover

bentwood-footstool-makeover

bentwood-footstool-makeover

Once it’s done it is an amazing result. The pop of color, the shimmer, the contrast again the white. I love it all! Hooray!! This room is really coming together now!

Sharing this project here:

A couple of months ago I stumbled upon a great thrift store find – this $3 pendant light.

make-a-terrarium-from-a-pendant-light

make-a-terrarium-from-a-pendant-light

The shape was the to die for (hello hexagons!). However, the electrical was on the fritz.

I kept the fixture around, waffling on whether I want to rewire it (a new lighting kit would do the trick) or turn it into something unexpected. You know me, I chose the unexpected. I chose to turn it into a terrarium! Except it needed to have a few changes made before it was plant ready.

Thankfully, the fixture came apart easily. I slipped out the electrical part and then just unscrewed the mechanism that allowed it to be hung. Now, I just had a flat top (or bottom for this project).

make-a-terrarium-from-a-pendant-light

make-a-terrarium-from-a-pendant-light

Then, I wanted to glam it up a little more so I grabbed my gold leaf rub ‘n buff and gilded everything that wasn’t glass. I love how it shimmers!

make-a-terrarium-from-a-pendant-light

make-a-terrarium-from-a-pendant-light

There were a few holes on the now bottom of the light fixture which I easily plugged with some caulk.

make-a-terrarium-from-a-pendant-light

After that was all dry I put in a bottom layer of stones and then a top layer of soil.

make-a-terrarium-from-a-pendant-light

make-a-terrarium-from-a-pendant-light

Lastly I used some succulents that I had picked up on clearance on Lowe’s (I always try to make a trip there this time of year for succulents – they are always at least half off or marked down to $0.50 or $1).

make-a-terrarium-from-a-pendant-light

After some arranging I had a beautiful display.

make-a-terrarium-from-a-pendant-light

make-a-terrarium-from-a-pendant-light

make-a-terrarium-from-a-pendant-light

make-a-terrarium-from-a-pendant-light

make-a-terrarium-from-a-pendant-light

make-a-terrarium-from-a-pendant-light


I love having succulents around the house. They are hardy and always colorful. This display brings back some fond childhood memories too. I had a pink cactus like that for years when I was a kid. It was the plant I could keep alive!

Sharing this project here:

Oh, fall! Tis the season for outdoor maintenance, right? I’ve already shared how we did some major pruning in the front of the house (goodbye holly trees bushes).

how-to-prune-for-fall

Now is another fun outdoor home maintenance project – cleaning moldy gutters. Sarcasm intended.

how-to-clean-moldy-bricks-and-gutters

Boo. This is not a project that I look forward to. I shouldn’t complain since we have lovely gutter guards that keeps all debris out of them. So really, I am only talking about the mold that grows between the guards and gutters. Every year a nice line of mold seems to accumulate. It’s probably just me but it feels like it is staring at me every time I pull up to the house. Whew, is it hard to take pictures of mold on gutters. Bare with me here.

how-to-clean-moldy-bricks-and-gutters

how-to-clean-moldy-bricks-and-gutters

Last year, on a whim, there was a beautiful day in October and I decided to clean those gutters. So I drug out a bucket, dish soap, and brush and spent two hours of intense upper body strength scrubbing. They ended up mostly clean and I ended up quite sore.

This year, I decided to try to work smart, not harder. I decided to give the cleaner we used to clean the vinyl siding – Clorox Pro Results Outdoor Bleach.

how-to-clean-moldy-bricks-and-gutters

First, I attached the cleaner to the hose and sprayed down the gutters with the cleaner. After letting that sit a few minutes and work for me, I started scrubbing.

how-to-clean-moldy-bricks-and-gutters

Wah-la! That’s the easy way to clean gutters! It took about 3 passes of spraying down and two rounds of scrubbing.

how-to-clean-moldy-bricks-and-gutters

Here’s a before and after to really see the result:

how-to-clean-moldy-bricks-and-gutters

After:

how-to-clean-moldy-bricks-and-gutters

Then, I was feeling so good I decided to give cleaning the moldy brick that was hidden behind the giant holly bushes.

how-to-clean-moldy-bricks-and-gutters

how-to-clean-moldy-bricks-and-gutters

After checking to ensure that this cleaner was safe for bricks (it was) I did the same process as I did with the gutters. Spray, let sit, scrub, spray, repeat.

how-to-clean-moldy-bricks-and-gutters

how-to-clean-moldy-bricks-and-gutters

how-to-clean-moldy-bricks-and-gutters

how-to-clean-moldy-bricks-and-gutters

After about an hour worth of spraying and scrubbing I came away with clean gutters and clean bricks. What I thought were going to be two big projects turned into one pretty easy project. Now we can hang some Christmas lights (soonish) on this mold free house!

  • Patsy

    I know of a cleaner that doesn’t require any scrubbing at all and it’s Tough Jobs Bathroom cleaner with bleach. Simply spray on the gutters and hose off.ReplyCancel

  • Becky Ermann

    Why not use a power washer to clean vinyl siding?ReplyCancel

    • What I’ve heard about using pressure washers on vinyl siding is that it can be too powerful and hurt the siding. However, in some of the comments people have said it’s worked on the low pressure setting. I am just nervous about hurting our siding!ReplyCancel

Fall…it’s a time for changes, pumpkins, leaves falling, and pruning! Yup, pruning  is right! One of the best months to prune your plants is in October when temperatures are falling. Eric and I had talked about some big pruning plans and lo and behold when I came home from vacation last week Eric had surprised me with this…

how-to-prune-for-fall

Whew! Look at that pile of trees bushes.

Those are the holly bushes that had previously flanked either side of the house. Please, just go with me on the before pictures since I am using ones from other photo shoots since this was a surprise pruning to me.

www.rappsodyinrooms.com

www.rappsodyinrooms.com

www.rappsodyinrooms.com

Spoiler alert: we are having some major tree work done soon (fingers crossed since we’ve been on their list for months), and we thought we would ask them to grind these up when they do the work on the trees. Therefore, they are just hanging out in the front while we wait for the tree guys.

how-to-prune-for-fall

Back to the holly bushes. They were beautiful, especially in the winter with their bright red berries (remember when I used them for table settings?) but the thing is, these boys were just too big for their britches. They had outgrown their welcome…okay now I’m all out of clichés for now. Actually, we were really concerned on how tree-like they were becoming and didn’t want their roots to mess with our foundation. So down they came.

how-to-prune-for-fall

how-to-prune-for-fall

how-to-prune-for-fall

At first I was scared of how it would look. They were so beautiful and green all year round. I was surprised. I LOVE the look. It is so bright and airy now without those heavy weights of bushes. I think they really open up the house and just make it even more welcoming. I’m a huge fan of this change.

how-to-prune-for-fall

how-to-prune-for-fall

It did open up a few more problem areas, like that moldy brick that was previously hidden and the propane tank that was previously hidden.

how-to-prune-for-fall

how-to-prune-for-fall

There will be some cleaning and replanting of smaller plants but for now we are just enjoying these wide open spaces.

Now, for the much anticipated before and after segment:

www.rappsodyinrooms.com

how-to-prune-for-fall

spray-painting-front-lights

how-to-prune-for-fall

Those bushes coming down definitely got me in the pruning mood. I went around and pruned back all of our other bushes (not much to show, just more shape and less scraggle). [Also, am I the only person who feels like they’ve unleashed their inner hairstylist while pruning?] I love it. With that done it’s feeling so much tidier. Well, it will once the big pile in the front is gone. Now it’s just fun to wonder what the neighbors are saying. [Insert evil laugh here.]

In case you are picking up your pruning shears this month, I thought I would pass along some falling pruning tips and tricks that I have learned along the way:

  • If plants are looking dead or diseased, it’s time to just bite the bullet and take them out. They’re not going to make the winter. This gives you time to replant now (October has ideal temperatures and moisture levels for planting bushes) or plan for the spring.
  • I like to prune down plants as much as I am comfortable with. I think it just gives it a cleaner look. So go for it – cut away.
  • Invest in a good pair of shears – and don’t forget that electric tools are handy too! My arms are always killing me after a good day of pruning. There’s no way that regular shears could have handled the holly bushes. Chain saw action all the way! Electric shears are great for shaping bigger bushes.
  • Use Google if you aren’t sure. Have a specific plant that you need to know if you should prune and when? Just Google it. A lot of plants say they have specific times they should be pruned. However, I am an uneducated, lazy, low-maintenance gardener doing the best I can and learning as I go – so I mainly do one good pruning in the fall. It works for my house and my life.