Whenever I go to a fabric store I feel like I want to buy a yard of every beautiful fabric that catches my eye (hint: that’s a lot). Not being an avid sewer (or quilter), I usually have no use for buying them (a girl can only get away with so many pillows in the house…says my husband).
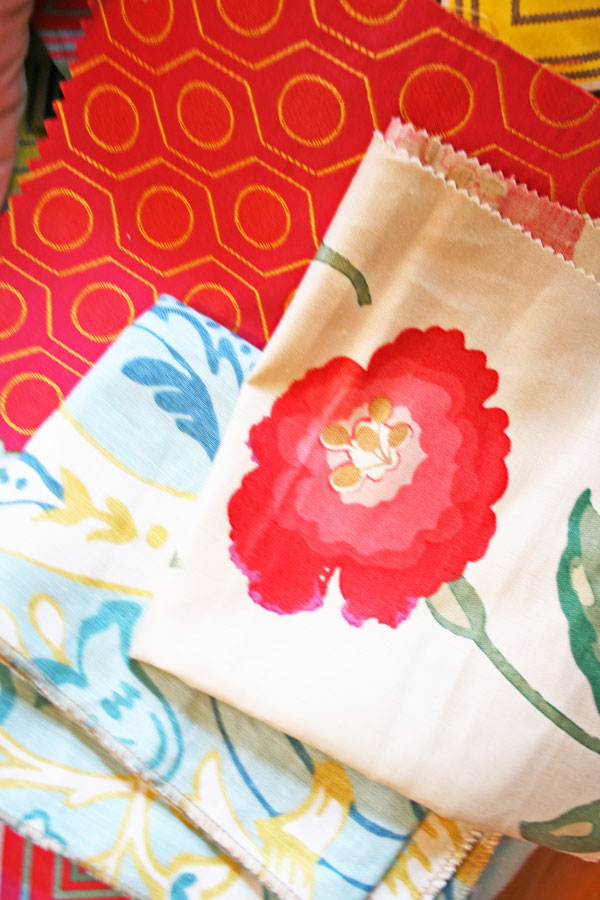
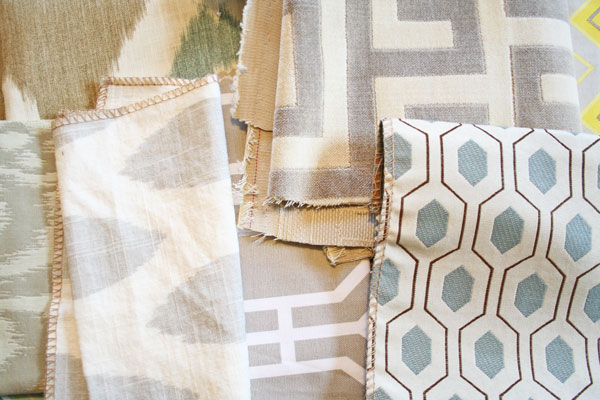
However, when thrift store shopping with my mom on her annual visit we came upon a designer’s collection of sample fabrics. They were the gorgeous, expensive fabric samples used for high-end clients; you could tell. There were so many beautiful ones we spent at least an hour digging through them and putting together a collection of our favorites.
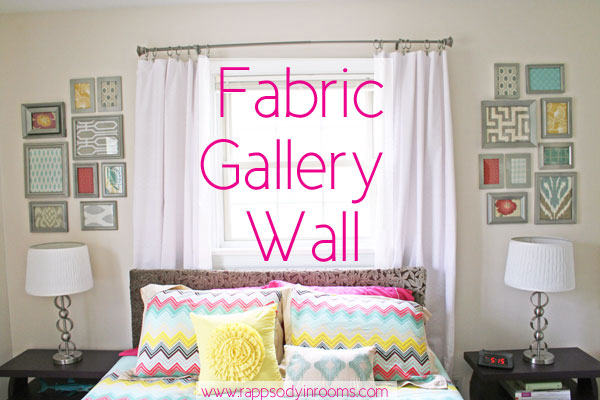
These favorites are now beautifully displayed in my home in the form of a gallery wall. Hurray! I finally have an excuse to buy all the beautiful fabric I love. I can easily switch out fabrics on the wall, keeping the gallery fresh and satisfying my fabric buying urge (plus, I only need a little but so I don’t have to buy much fabric). Win!


The gallery walls ended up flanking the guest bed.

With the crazy patterned duvet cover, I have been trying to keep things sort of tame throughout the rest of the room – like my white chevron curtains. However, with the duvet being the focal point for an otherwise pretty neutral room, that’s the only place my eye landed when looking at the room. I needed to make my eyes travel throughout the room. That meant bringing focus up the wall. Hence the solution of flanking gallery walls!
I first combed through the house finding all the old frames I had that weren’t in use (it was surprisingly a lot).

To fill in the rest of the space I went to the dollar store and bought the rest. I focused more on shapes and size, not color, because I knew I was going to spray paint them all a nice, glittery silver.

After they were all painted and gorgeous, I began working on the layout. I knew I wanted to balance the two sides of the wall, so I decided to try to keep an equal number of frames with equivalent sizes.
After I hit upon something I liked on the bed, I transferred it to the wall using a paper cutout of the frame. This allowed me to get a better visual and play around a bit more without committing a million holes to the wall.

Finally I got my galleries right. Now knowing where my frames were going to go, I needed to put in the fabric. I wanted to wait until I had the frame arrangement so I could make sure the fabrics looked good in their position on the wall too.

I started with the bolder pops of color. Since I went a bit neutral on most of the fabrics (again, that duvet is crazy) I wanted to make sure I had pops of color on both sides of the wall. I picked those out and placed them first. Then I just played around with the other ones until I hit upon something I liked.
I then traced the glass of the frame onto the back of the fabric and cut out the fabric. Then into the frame they went!
To hang them on the wall I just took down one placeholder paper on the wall, starting at the bottom of the gallery wall. I would then hold up the frame in the position I liked and make a small pencil line at the top middle. Then I would measure from the top of the frame to the top of the nail holder. I would mark that measurement to the wall and put a nail in it. This was a really easy way to get the wall exactly how I wanted it to look. I think there was only one time I had to do two holes for a picture. One mess up in hanging pictures is HUGE for me. If you take off some of my pictures from the wall it can be quite the embarrassing amount of holes.


After this was finished, I was thrilled with the result! First, I didn’t have a gallery wall in the house yet and I have been itching to do one. Secondly, this is exactly how I envisioned these walls coming together.


I LOVE them! I love the fabrics, the different frame shapes, and the texture. I also love how it can change with however I am feeling. If I get tired of fabric, photographs or artwork can easily be switched in and out.


Love it! Like you, I always admire gorgeous fabric when I’m out but have no practical use for buying any of it. My mother-in-law is a fantastic quilter, but I can only beg her to complete so many projects for me! I love this idea and think your results are fab.
Thank you so much Meg! It sounds like your MIL is so talented! I hope you can beg a few projects out of her! If not, frame those beautiful fabric squares!
Your gallery wall adds a lot of interest to your guest bedroom walls and it’s a great way to use those pretty samples. Did you get them downtown?
Thanks Paula! I did get them downtown at Moyanne’s estate store. It was nice to finally find a reason to buy some of her gorgeous fabric samples!
Your house makes me happy! I love your guest bedroom – especially the bedside tables. This encourages me to do more with our house. 🙂
Thanks Samantha! It makes me happy to hear that! I always want people to feel happy when they come to our house. Those bedside tables were such a fun find too. I got them at a thrift store for $11 each and painted them. From the pictures I see on Facebook it looks like you are doing LOTS with your house!
Love the room? Where did you get your curtains and rods? I love how simple and pretty they are.
The room is beautiful!
Thank you Kris! I made the curtains from fabric from JoAnns. The curtain rods are from Big Lots.
http://rappsodyinrooms.com/2014/03/28/new-curtains-guest-room/