Let the Christmas season begin! Or at least let it begin here on Rhapsody in Rooms since clearly Christmas has begun everywhere else come November 1st (I would especially like to thank Hallmark Channel for starting your Christmas movies that early).
I am so excited to start the Christmas festivities here with a very special blogger Secret Santa tour. A group of my blogger friends and I all got together and decided to do a DIY Christmas Secret Santa. That means I made a fun Christmas craft for my friend Jeanette at Country Design Style and my friend Nancy from Artsy Chicks Rule made one for me!

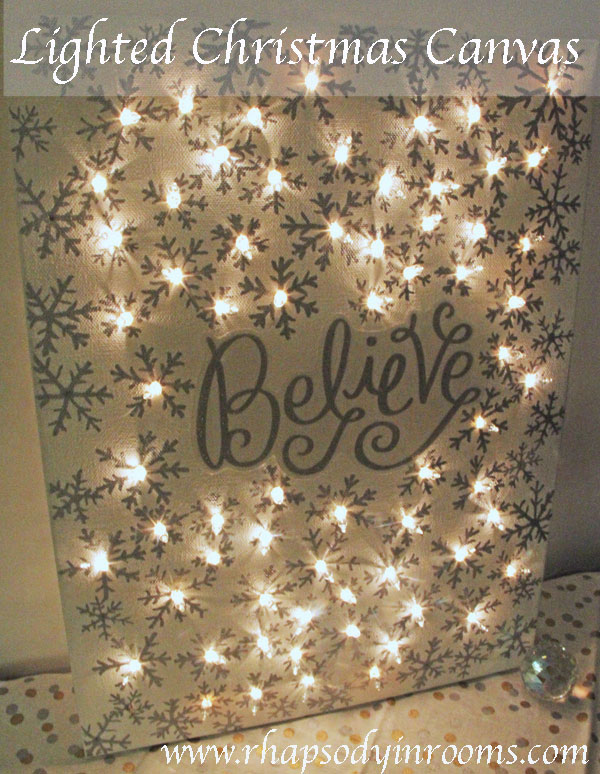
Let’s begin with showing you the Christmas craft I made Jeanette: a lighted Christmas canvas. [Thank you to Bubbly Nature Creations for the inspiration!] It is so easy to make but adds such a nice sparkle to Christmas decor!

Supplies
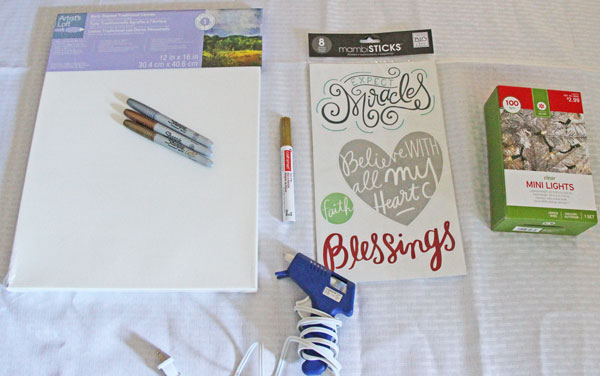
- 16 x 20 white canvas*
- 100 mini-lights*
- Silver Sharpie*
- Stencil or sticker* with message you want (mine was a multi-pack of stickers from Michael’s that wasn’t necessarily Christmas but I made it work for the holidays)
- Something sharp for making holes (like scissors, skewer or the like)
- Optional: hot glue gun* (I ended up not needing one)
*Designates affiliate links

Directions
1. Pick your message (using either stencil or stickers) and decide placement on your canvas. I went classically centered.

2. Using your silver Sharpie draw snowflakes of various sizes all over your canvas. I started by drawing the dots for placement first and then finished up with the full snowflake. Really fill up the canvas to make it seem oh so snowy and sparkly! I tried to make one hundred snow flakes to fit my one hundred mini lights. However, I wasn’t able to use all my snowflakes with lights because they were too close to the wooden frame so add more snowflakes if you want to use all the lights.


3. Use your sharp object (I used scissors) to make a small hole in the center of the snow flake.

4. Push your lights through the holes. If you made any holes too big you can use a dab of hot glue to secure the light in place.

5. Plug it in and you’re done!


Now, to show you Nancy’s craft she sent me! I LOVE it so much! It is a naughty/nice stocking with jingle bells. Plus, she stuffed it with chocolate goodies and you know that it is the key to my heart!


For even more fun DIY Christmas crafts and to see what all my blogger friends sent each other visit all their sites for beautiful Christmas decor and inspiration!


Cute idea for a canvas! This is such a fun blog hop that you guys are doing. Off to see what everyone else made and received.
Thanks so much Marie! I’ve had so much fun with this blog hop!
Love your Believe lighted canvas!! Very clever!!! It’s so pretty…and I’m glad you like your stocking!! 🙂
Nancy
Nancy – I LOVE my stocking!! I really needed one too so it came at a perfect time! Thank you so much!!
What a beautiful and creative way to celebrate, Megan. VERY impressive.I love this idea! Pinning.
What a great blog tour!
Thank you so much, Meegan! I love anything that adds more sparkle any time of year but especially at Christmas. I love this tour too!
This is a great project Megan! I am going to give this a try. Thanks so much.
Thank you, Vanessa! It’s so easy too! I did it while watching a Christmas movie which made it extra fun!
I love love love this, Megan!! It might just be my favorite. 😉
Aw shucks! Thanks Christy! I won’t tell anyone…
What a great idea for a craft. I love the lights and bet that it looks so pretty at night lit up.
Thank you, Paula! I love Christmas lights at night. They are so cozy! I am seriously thinking of making one for myself!
Megan, I can’t even begin to tell you how much I L~O~V~E the believe sign! We have family visiting and had a blast adding it to the mantel. We were trying to figure out how you did the snowflakes. Some guessed stenciled and some hand drawn. It’s such a treasured piece for our home for many years to come. Thank you so very much. Wishing you a wonderful holiday. Your friend Jeanette.
Oh Jeanette you just made me weepy over here! Thank you so much for your kind words! It makes me so happy to hear how you were able to make it part of your mantel. And the snowflakes were all hand drawn. All it took was one Christmas movie to draw them! It was fun! Yay! Sending you lots of Christmas love!
Love it! It’s so clever and too cute for words! Have a Happy Thanksgiving!
Leslie
Thank you so much Leslie!
This is gorgeous Megan! I bet it so pretty to light up esp at night! You did an amazing job 🙂
Thank you Dria! Nothing beats Christmas lights at night!
I LOVE this!! You know how I love snowflakes, I might have to make one of these.
Yay! You should Jill! It’s so easy and a fun craft to make in front of a Christmas movie!!
[…] For step by step instructions please click here […]
I love love love this! I love it so much I had a go at making one and putting it up in my living room, it has pride of place. I took a picture to show all my friends on facebook, big mistake, now they want me to make them for all them too!
Thanks again, and your lighted canvas will be adorning living rooms throughout Wales, UK soon ha ha 🙂 xxx
Yay!! I’m so excited to hear this! How fun! You should suggest a crafting party where you can teach everyone to make them!
Very cool. I’m making these for my cousins this year. One question though, did you discover a particularly good way to secure the lights so that they don’t pop out? Mine keep falling out.I cod just use duct tape, but there may be a better solution.
What a fun idea! You could use a little hot glue to secure the lights in place. Or just any clear bonding glue (without heat) that dries quickly. I’d just put a little squirt from behind and it should hold them in place. This Scotch quick drying tacky glue might work well: http://www.scotchbrand.com/wps/portal/3M/en_US/ScotchBrand/Scotch/Products/Catalog/~/Scotch-Quick-Drying-Tacky-Glue?N=4335+5584746+3294602101&rt=rud
To help eliminate this step try and make the holes as small as possible so you have to work the lights into them. This should help them not pop out all the time.
[…] Lighted Christmas Canvas – Rhapsody in Rooms […]
very pretty canvas project!
Thank you Maria!!
what size is the wood pieces on the back and how did you secure them to the board? BEAUTIFUL!!!
I actually bought the canvas at the craft store so it was all ready to go – no assembly necessary! Makes it very simple!
I want to make these for my camping club ladies for Christmas gifts next year. Yeah give me a challenge for a whole year. Thank you so much
That’s such a great idea! Start early since they are a little time consuming!
I just happened to see this on Hometalk this morning and wanted to tell you that I plan to make my own for this year for my shop. In fact, I think that I’ll make several!
That’s awesome! Start early. They are fun to make but time consuming!
[…] Great Christmas decor project! Want to make one? Check out the tutorial via Rhapsody in rooms. […]
[…] If you like your snowflakes to twinkle then this is the art work for you. An easy DIY project that will make your lounge room sparkle with Christmas cheer. (via Rhapsody in Rooms) […]
[…] via: rhapsodyinrooms […]
how did you get the sticker to stick??
Mine went on easily and stuck really well. If yours isn’t sticking maybe your canvas is too rough? Or not a good quality sticker? If not, I bet some glue would work well!