Sometimes I feel like I live my life by the Tim Gunn mantra “Make it work”. I’m good with that because I think it is such a great saying that can be applied to so many areas in my life (I even have this saying posted above my desk at work)!

I’m especially liking this as I try to simplify my life by getting rid of the stuff cluttering my life and living a little more minimally. I’m definitely taking baby steps in that area but I was so happy to make a few little changes in the living room that made me feel resourceful. I used what I had (with a small tweak) and had a make it work moment.
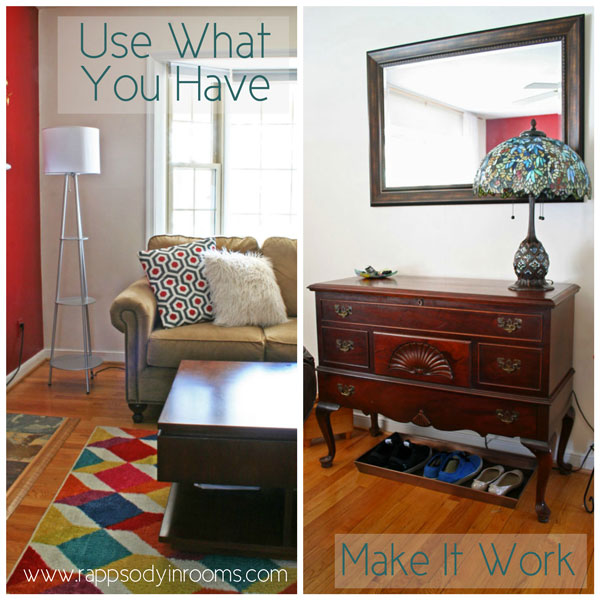
Using What You Have and Making It Work Moments In The Living Room | www.rappsodyinrooms.com

My Use What I Have Moment

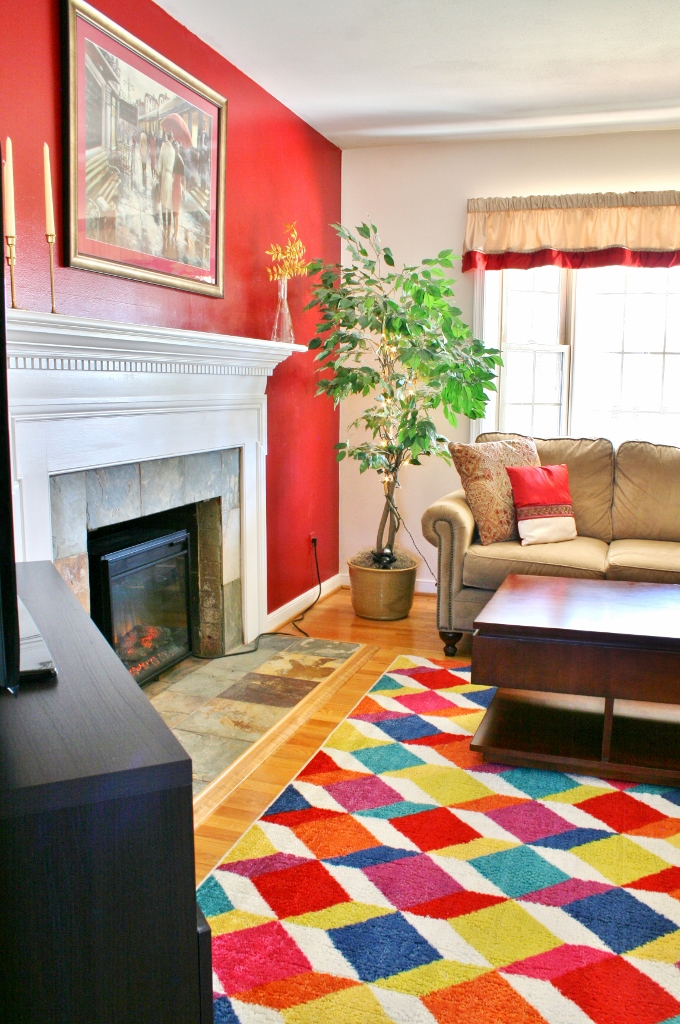
The first one was in regards to this fiscus plant.
decorating-with-a-spouse-living-room-12

It was a hand-me-down from my mom but it had definitely lived its life and purpose in her home and ours. It was in good shape but it just wasn’t the look and feel we wanted for the living room. However, we loved the ambient light it gave out with the Christmas lights on it all year round.

When looking for something new for that corner we knew having low lighting was the number one priority. It also needed to have height to fill that corner.

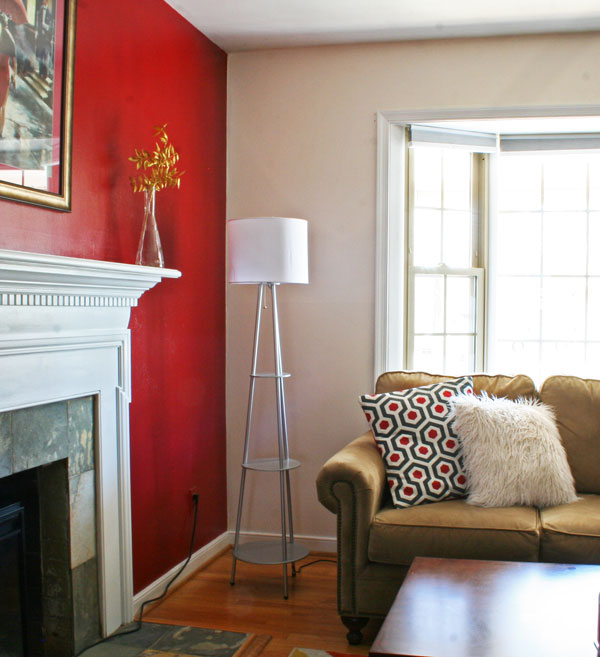
After hours of online shopping we couldn’t find something that we loved. Feel slightly frustrated I took a trip around the house, thinking perhaps we could cobble together something for that corner. I came across this silver lamp from Target a couple of years ago that had the height and interest that could perhaps work in that corner.
Using What You Have and Making It Work Moments In The Living Room | www.rappsodyinrooms.com

We put it into place and immediately LOVED it! I was thrilled that something not being used that was just cluttering up our basement was the perfect fit! However, it wasn’t the perfect color. That light silver look wasn’t jiving with all the gold and brass.

Using What You Have and Making It Work Moments In The Living Room | www.rappsodyinrooms.com

I used the same spray Design Masters 24 Karat Gold that I used on the electrical conduit curtain rod to make it blend with the room more.

How to make a curtain rod from an electrical conduit | www.rappsodyinrooms.com

How to make a curtain rod from an electrical conduit | www.rappsodyinrooms.com

How to make a curtain rod from an electrical conduit | www.rappsodyinrooms.com

How to make a curtain rod from an electrical conduit | www.rappsodyinrooms.com

What a change it made to this budget lamp! It definitely had a more upgraded look, plus it blended with the room better.

My Make It Work Moment

We have a beautiful entry way table in our living room. Not having an official mud room or entry way, this and our entry way closet are the only organization and catch-all centers when we walk in the door.

decorating-with-a-spouse-living-room-05

Our closet is working really hard and is filled to the limit with car cleaning supplies, coats, hats, and gloves.

The top of our entry way table is a great place to put keys in and as a holding zone for items going out the door.

The one item that wasn’t being cared for in our entry way area were the shoes. Eric is quite the connoisseur of shoes and his exquisite collection tends to hang out in 2-3 pairs by the front door (I keep all of mine in my closets for the most part).

At first I thought we needed to purchase a whole new entry way table to solve the shoe dilemma. I wanted a cabinet that the shoes could be stored in so I didn’t have to see them.

Then, I realized that the shoes were the only problem at this point. Instead of getting rid of what we had and replacing the table, I knew I could make this work (and save money and be more practical). I stumbled upon this copper boot tray online at Target and knew this was the solution. The size and color were perfect for the room.

Using What You Have and Making It Work Moments In The Living Room | www.rappsodyinrooms.comUsing What You Have and Making It Work Moments In The Living Room | www.rappsodyinrooms.com

When I got it and slid it under the table, I knew this had been the right decision. No, it doesn’t hide the shoes, but really, who cares? Would we really open the cabinet every time we needed to put our shoes away? Probably not. This was also a reminder that I needed to remember that we live in this house. It’s definitely not a show room. So who cares if we see our shoes? They’re pretty – and this is practical.

Using What You Have and Making It Work Moments In The Living Room | www.rappsodyinrooms.com

I am oh-so pleased with this make it work moment. All it took was $25 and an open mind!

Have you had any use what you have or make it work moments in your home? Share in the comments below!

  • Love that lamp in the corner of your living room in place of the tree.

    Using a tray for shoes is a great idea for a home without a mud room. (I want a mud room by the way!) Our porch becomes a dumping ground for shoes but I solved the problem by shopping my house just like you did and moved a shelf from the basement to hold the shoes. Just having the shoes on a shelf instead of scattered all over the floor makes a big difference.ReplyCancel

    • Thanks so much Paula! I definitely would love to have a mud room too! Your shelf idea for shoes sounds like a great idea. I might have to incorporate that into places in my house too!ReplyCancel

  • I just stumbled onto your blog from Pintereet and love your style!
    That lamp looks amazing and I decorate my house using what I like to call “working with what ya got”.
    This is perfect!ReplyCancel

    • Thank you so much Kari! I am so touched by your sweet comment! I’s so glad you like it!ReplyCancel

  • Although I definitely prefer the “before” with the plant myself, I love the “making it work” idea. And that carpet; that is colorful and amazing!ReplyCancel

    • Haha. That’s so funny Emily! Each to their own for sure! Thanks for the carpet love!ReplyCancel

  • Where did you get that carpet????? I love it!ReplyCancel

After living with the pillows that came with the couch for years (don’t ask me why – we’ve never liked them) I finally got around to covering them! However, I used a new method for covering the pillows this time. I made envelope pillows covers – and I’m totally hooked. They are easy to make and easy to take off and wash or change out.

How to Make Envelope Pillow Covers | www.rappsodyinrooms.com

I picked up the fabric at the Charlottesville U-Fab the same time we got the fabric for the foam board cornice.

We decided to do a different fabric for the front and back (this helps to save cost if you want a more expensive fabric for the front of the pillows). We chose the geometric print for the front and then just a plain cotton red fabric for the backing.

How to Make Envelope Covers for Pillows

1. Measure your pillow length and width. Cut your front fabric to be the length and width of the pillow PLUS 2 inches for the hem. For the back part of your curtain you are going to make TWO pieces. Make each one the width of the pillow plus 2 inches on each side for the seam. Divide the length of the pillow by two and add 8 – 10 inches. This allows two inches on each side for the hem and then 4-6 inches for the overlap in the back. If you have flatter pillows you can use 8 inches. If you have very fluffy pillows use the 10 inches.

How to Make Envelope Pillow Covers | www.rappsodyinrooms.com

2. Sew a hem on the two pieces of fabric for the back. At this point you just need to sew a hem on one side (the width) where the two fabrics will overlap.

How to Make Envelope Pillow Covers | www.rappsodyinrooms.com

3. Now sew your pillow just like normal. Turn all the fabric inside out so the finish sides are facing each other. You need to lay your two back sides just how you want them to overlap. Make sure to leave about 4-6 inches of overlap so when you stuff it with your pillow you won’t see the old pillow inside.

How to Make Envelope Pillow Covers | www.rappsodyinrooms.com

How to Make Envelope Pillow Covers | www.rappsodyinrooms.com

4. Once sewn just flip inside out and stuff with your pillow!

How to Make Envelope Pillow Covers | www.rappsodyinrooms.comHow to Make Envelope Pillow Covers | www.rappsodyinrooms.com

Now you have pillow covers you can change anytime you want – or clean anytime you want!

How to make a curtain rod from an electrical conduit | www.rappsodyinrooms.com

How to make a curtain rod from an electrical conduit | www.rappsodyinrooms.com

How to Make Envelope Pillow Covers | www.rappsodyinrooms.com

How to make a curtain rod from an electrical conduit | www.rappsodyinrooms.com

  • Love that graphic print. I need to check out U Fabric the next time in C’ville!

    Envelope pillows are my favorite because it makes changing the covers so easy.ReplyCancel

    • You definitely need to visit them! It is just so nice to see such beautiful, high quality fabrics. Love them! I’m definitely converted to envelope pillows now too!ReplyCancel

  • I love your pillows Megan! Great tutorial too. 🙂

    NancyReplyCancel

I’ve really started learning what decorators have been saying forever: layer, layer, layer your rooms!

Adding a Bed Skirt As a Layer in a Room | www.rappsodyinrooms.com

I actually felt what that means when we added the floor length curtains in the living room. The room felt like it had depth and dimension. It felt deeper and more finished. It was definitely an ah-ha moment.

How to make a curtain rod from an electrical conduit | www.rappsodyinrooms.com

I also found that layers can be simple items too – not just dramatic curtains.

I recently added another layer to the guest room (after I had amped up the curtain situation) via a bed skirt. Yes, a bed skirt can count as a layer.

Adding a Bed Skirt As a Layer in a Room | www.rappsodyinrooms.com

I realized a bed skirt counts as a layer after I put it on. All of a sudden the room felt richer, more finished, and multi-dimensional. Not to mention it hid the ugly bed legs (and dust bunnies if I’m being real).

Adding a Bed Skirt As a Layer in a Room | www.rappsodyinrooms.com

Adding a Bed Skirt As a Layer in a Room | www.rappsodyinrooms.com

Adding a Bed Skirt As a Layer in a Room | www.rappsodyinrooms.com

Adding a Bed Skirt As a Layer in a Room | www.rappsodyinrooms.com

So I must agree with all those decorators out there – layer, layer, layer. Big and small, it helps. From curtains, to bed skirts, to pillows, and throws, no layer is too small.

Adding a Bed Skirt As a Layer in a Room | www.rappsodyinrooms.com

Now that I know how layers really add to the feel and look of a room I’m searching for more ways to add layers. What are your favorite ways to add layers to your rooms?

  • carol jane

    Awesome room. I agree. Lots of layers is so much more interesting. Just as we layer our outfits!ReplyCancel

    • Thank you! That’s a really good point! Outfits and rooms are very similar in the way you put them together!ReplyCancel

  • Adding a bed skirt to your bed makes your guest room all the more inviting. The white looks great with your colorful bedding.ReplyCancel

    • Thanks so much Paula! I’m really trying to make a comfortable room for guests.ReplyCancel

In celebration of upcoming Earth Day on April 22nd, I thought it would be fun to challenge myself to upcycle a project out of things I only have in the house. I decided to not just use things in my house but things that were also on the way out of my house. For instance, tin cans and an old plant stand.

How to Make an Upcycled Utensil Caddy from Cans | www.rappsodyinrooms.com

I am a huge fan of soup (all year round no less) so I have plenty of used cans hanging out in the recycle container. These were the basis of my project.

How to Make an Upcycled Utensil Caddy from Cans | www.rappsodyinrooms.com

I knew I wanted to make the cans into a utensil caddy for the sun room so I started looking around for something to make a base. I was thinking I was going to have to break out the tools and scrap wood until my eyes landed on this old plant stand in the yard sale pile.

How to Make an Upcycled Utensil Caddy from Cans | www.rappsodyinrooms.com

Sidenote: I have the sweetest memories of this plant stand. My mom and I picked it out together when we did a room makeover for me in high school. It stood by my bed for years holding my clock and pictures. However, time has passed and it was looking a little wonky. So I am thrilled to be able to hold onto a part of it filled with its memories.

I immediately started unscrewing the smallest stand from the rest of the stand. Once I had it off, I turned it upside down. I was thrilled with this new use! I had found the base of my utensil caddy.

How to Make an Upcycled Utensil Caddy from Cans | www.rappsodyinrooms.com

Now it was time to make it pretty!

I decided to sand down the wood and restain it Dark Walnut.

How to Make an Upcycled Utensil Caddy from Cans | www.rappsodyinrooms.com

Then I spray painted the cans a pretty gold.

How to Make an Upcycled Utensil Caddy from Cans | www.rappsodyinrooms.com

To disguise the look of the cans a bit more I used scrap paper (like I did with my coffee can upcycle) to cover the ridges. I seem to keep eeking projects out of scraps of paper most people would have tossed by now. #paperhoarder

How to Make an Upcycled Utensil Caddy from Cans | www.rappsodyinrooms.com

How to Make an Upcycled Utensil Caddy from Cans | www.rappsodyinrooms.com

Then I just used a little putty to secure the cans to the base to keep them secure.

How to Make an Upcycled Utensil Caddy from Cans | www.rappsodyinrooms.com

Filled with forks, knives, spoons, and napkins this is now the perfect addition to my sunroom emerald and gold table. I might have matched it on purpose. 🙂

How to Make an Upcycled Utensil Caddy from Cans | www.rappsodyinrooms.comHow to Make an Upcycled Utensil Caddy from Cans | www.rappsodyinrooms.com

How to Make an Upcycled Utensil Caddy from Cans | www.rappsodyinrooms.comHow to Make an Upcycled Utensil Caddy from Cans | www.rappsodyinrooms.com

If you are loving upcycles like me, here are a few more for ya.

Are you into upcycling? Have you turned trash or scraps around your home into something beautiful and usable?

PS: Don’t have the upside down plant stand? You can still make this! I suggest looking around your house for scrap wood or something else that could work. Or you could buy a wooden circle plaque and then use a wooden candle stick, newel post, or just round wooden stick and screw it to the plaque.

Happy Thursday everyone! I’m here with a special bonus post today! I was honored to be on Fox morning news to do not one but TWO segments for Hometalk’s spring cleaning campaign.

I did one a couple of weeks ago on Daytime Blue Ridge so it was fun to talk about the same topic in a different way with a new host.

PLUS Bob Grebe pretended to be a ceiling fan that I cleaned. That in and of itself is probably enough to get you to press play.

Thanks for everyone who has been so supportive in my fun little TV segments. I’ve been having such a blast!

  • Congratulation on getting another tv segment! You just might have your own show before you know it. 🙂ReplyCancel

    • Thanks so much Paula! Haha. I think I’m far away from my own TV show but one can dream!ReplyCancel

  • Yay! Lovin’ all your tips! You’re a natural Megan! Funny he just had to be the fan blade. Pillow case. Genuis idea…btw!ReplyCancel

    • You are so sweet Therese! Thank you! Wasn’t that hilarious when he wanted to be the ceiling fan?! I had a hard time not busting out laughing!!ReplyCancel