Brownies. Boom. Done. That’s how I feel. Like I should make these brownies and throw some flour on the ground in a puff of smoke as a sign of triumph.

The Best Double Chocolate Brownies Ever | www.rappsodyinrooms.com

Let’s back up a little. I have been on the hunt for the perfect brownie recipe. Don’t get me wrong, I love brownies from a box. They are Delish with a capital “D”. I just like to bake things from scratch. I find it relaxing and rewarding.

However, I just haven’t been able to make brownies that taste better or even just as good as the box mix.

They are either too cake-like, doo dense (like gooey, sticky, bad dense), or too hard. I needed to find the recipe that was juuuuust right.

Then a chocolate craving hit me one weekend and I came across this fudgy recipe from Something Swanky.

These came out perfect – marvelous – delicious – spectacular.

Mission complete. Brownies found. Eat your heart out.
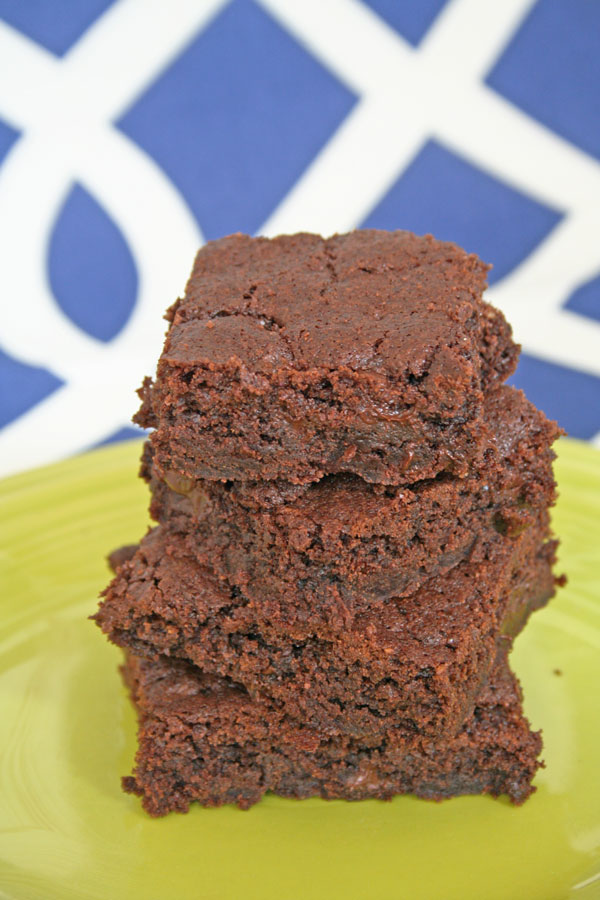
The Best Double Chocolate Brownies Ever | www.rappsodyinrooms.com

Double Chocolate Brownies

Ingredients

  • 1/2 cup butter, room temperature
  • 1 cup granulated sugar
  • 1 tsp vanilla extract
  • 2 eggs
  • 1/2 cup all purpose flour
  • 1/2 cup cocoa powder
  • 1/4 tsp baking soda
  • 1/4 tsp salt
  • 2 cups chocolate chunks

Instructions

  1. Preheat oven to 350 degrees. Line a 9×9 baking dish with parchment paper.
  2. Beat together the butter, sugar, and vanilla in a stand mixer bowl. Add the eggs one at a time, mixing well between each addition.
  3. Stir together the flour, cocoa powder, and salt. Gradually add the dry ingredients to the butter mixture. Mix in the baking soda.
  4. Mix in the chocolate chunks with a wooden spoon or spatula.
  5. Once the batter forms (it will be thick), scrape it into the prepared dish and spread evenly.
  6. Bake for 25 minutes, until brownies begin to pull away from the side of the pan.
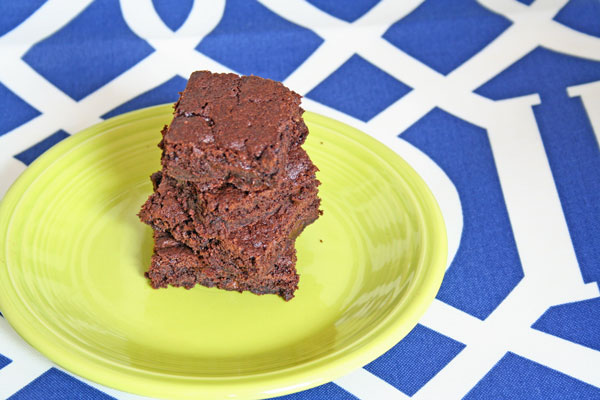
The Best Double Chocolate Brownies Ever | www.rappsodyinrooms.com

  • These sound delicious! I don’t often make brownies but when I do, we really enjoy them.ReplyCancel

    • I highly recommend them! And they make the smaller pan, which is good for me because I could eat the whole pan! 🙂ReplyCancel

Do you understand the color wheel? The wheel in which all of our colors are based upon? The little wheel that can explain how to pair the perfect colors together?

Honestly, it can be a quite mind boggling, so I decided to break it down over at Teal & Lime to help us understand exactly how the color wheel works. I promise you’ll feel better after reading the post since its quite complementary. 😉 That’s right, a color wheel joke.

How to Make a Wooden Color Wheel | www.rappsodyinrooms.com

Now you may notice in that picture that my color wheel has some texture and wood grain to it. That’s because it is a color wheel made out of a block of wood. Here’s how I made a color wheel from a wood block.

How to Make a Wooden Color Wheel | www.rappsodyinrooms.com

Step One:

Find your hunk of wood. I can’t really take credit for this since my boss had some scrap wood lying around and kindly cut me a nice circle of wood. However, I do recommend using a piece of wood from a hardware store since wood from nature has not cured yet so it will crack and flake. It all depends on how long you want the wheel to last.

However, buying a round wood plank from a craft store or even a wooden charger would work just as well. You just need something round.

How to Make a Wooden Color Wheel | www.rappsodyinrooms.com

Step Two:

Sand your wood block smooth on the sides and top. I rubbed some Minwax Dark Walnut stain around the outside to give it some depth.

How to Make a Wooden Color Wheel | www.rappsodyinrooms.com

Step Three:

Identify the middle of your wood block. That has generally already been marked to make your circle. Then divide the circle in 12 equally sized slices. I did this by dividing it in half and then into quarters. Then, each of those quarters needs to be divided into three equal sections.

Honestly, a little measuring and eyeballing can get this done quick. I wasn’t looking for absolute perfection because that type of math didn’t seem worthwhile to me. You know, still trying to prove that I won’t need geometry in real life (so not true for a DIYer).

Also, I used very faint lines so it’s pretty hard to see. Squint hard.

How to Make a Wooden Color Wheel | www.rappsodyinrooms.com

Step Four:

Pull up a color wheel on Google Images. You will use this to base your color wheel on. I then took my colored pencils and picked out the shades that matched each section of the wheel. Then, you just color straight on the wood. Yes, it’s that easy. Just color your wheel.

How to Make a Wooden Color Wheel | www.rappsodyinrooms.com

How to Make a Wooden Color Wheel | www.rappsodyinrooms.com

Step Five:

I can’t help but bling things up a little. To add a little glitz and definition to the top of the wheel I drew gold Sharpie lines to divide the colors. Then, to add a little sheen to the outside of the wheel I, took a metallic rose colored craft paint and rubbed into the stained area. Now it has depth and sheen!

How to Make a Wooden Color Wheel | www.rappsodyinrooms.com

How to Make a Wooden Color Wheel | www.rappsodyinrooms.com

Now you have a beautiful wood color wheel. Check out how to use the colors to your advantage over at Teal & Lime.

You can also use this as beautiful decoration in your home. It can be a giant coaster, a plant stand, artwork, an added layer on a side table…the options are endless! Would you ever use a giant color wheel as decoration for your home? Have you ever made any project decisions using a color wheel?

  • Megan, I love it so much. I love that it is so thick. I would totally use this as an accessory. It reminds me of accessories Pottery Barn sells. I think it would be awesome on a coffee table. Thanks so much for sharing your color expertise over on Teal & Lime!ReplyCancel

    • Thank you, Jackie! I especially love the chunkiness too, which is why I kept beautifying it with stain and a little shimmery paint. It’s been fun playing with it in different places around the house. I’ll have to go try it on the coffee table now!ReplyCancel

  • This would look great on one of your shelves on display. It also would look pretty on your porch!ReplyCancel

    • Ohh I should definitely try it on the porch! That’s a great idea! Thanks Paula!ReplyCancel

Do you have that space in your house that has blank walls just waiting to be adorned with a beautiful piece of artwork? Well I sure do. It was our hallway.

Ikea Travel Prints in the Hallway | www.rappsodyinrooms.com

Our hallway has had blank walls for the entire time we have been in this house.  I had grandiose plans to have this beautiful gallery wall. The plans were so grandiose that I never got around to putting it together. I couldn’t decide what type of gallery wall I wanted: eclectic, all one color frames, all same family of frames, etc. To me, I built this gallery wall project up in my head so much that it never happened.

Lesson learned: don’t let projects grow so big in your head that your hands feel paralyzed. Do something!

Thankfully, Ikea is a great place to shake out the jitters and just get something done. Usually, you don’t have to spend a lot to try something. Not that I tried anything big here – I hung pictures on the wall. But it made me move.

Specifically these three travel prints made me move and shake in the art area, snatching up these prints and frames with glee.

Ikea Travel Prints in the Hallway | www.rappsodyinrooms.com

Ikea Travel Prints in the Hallway | www.rappsodyinrooms.com

Ikea Travel Prints in the Hallway | www.rappsodyinrooms.com

I loved the colors – bright and modern – and the simplicity of the lines. Plus, I’ve been to all of those places so they all have a special place in my heart. In case you haven’t learned by now, anything about travel, different countries, maps, and globes are my decorating jam.

Once I got them home I just knew that the hallway finally had something to adorn its blank wall. These are bright and thin so they won’t prove to be a hindrance in our regular, semi-dark hallway.

Ikea Travel Prints in the Hallway | www.rappsodyinrooms.com

Once hung, I was in love. It is so rewarding to finally have something on the walls of the hallway that we constantly walk through multiple times a day.

Ikea Travel Prints in the Hallway | www.rappsodyinrooms.com

Ikea Travel Prints in the Hallway | www.rappsodyinrooms.comIkea Travel Prints in the Hallway | www.rappsodyinrooms.com

Now, I have these cheery prints that just buoy my mood every time I look at them. So remember, if a project just seems too daunting – just start. You’ll be glad to just see results!

  • These look great in your hallway. I love the pop of color that they give your walls and also love that the frames don’t stick out too much.ReplyCancel

    • Thanks Paula! They are definitely great for the hallway with their slim fit. They are also great for occasional bumps because they have the plastic instead of glass in them!ReplyCancel

  • They look great Megan!
    Blessings,
    CindyReplyCancel

  • Great advice! And love your prints! They really do make your hallway HAPPY now!ReplyCancel

    • Thank you Therese! The are such a happy place now! Finally, right?!ReplyCancel

  • Linda

    Lovely and cheery. How did you hang the framed prints to keep them so flat?ReplyCancel

    • Thank you Linda! Fortunately the frames are very thin anyways. However, I just tapped the nail in very close to the wall and hung it on that. Also, sometimes I will hang the frame and if it still isn’t flush enough for me I will push on the front of the frame near where the nail is and push the nail in further until the frame sits more flush against the wall. Hope this helps!ReplyCancel

Continuing on my spring cleaning trend, I’m here to share some of my favorite tools and tricks to make cleaning as easy and efficient as possible. As much as I enjoy the result after a thorough cleaning, I am not all that into the process (shocker right? soo many people love cleaning). Every once in a while I really get gun-ho about cleaning. All the rest of the time I choose other, more fun activities over cleaning. To make me actually clean my house (and not just when company is coming), I had to find tricks that made it as easy and painless as possible.

Here are my not-so-secret cleaning tactics.

Spring Cleaning Tips, Tricks, and Tools for Easier Cleaning | www.rappsodyinrooms.com

Microfiber Cloths for All-Purpose Cleaning

Spring Cleaning Tips, Tricks, and Tools for Easier Cleaning | www.rappsodyinrooms.com


It took me marrying a car guy to find the beauty of the microfiber cloth. I was a sponge cleaner all the way – until there was a never ending pile of microfibers cycling through the laundry. So one day I decided to try cleaning with them (if it works for a car it should work for a house, right?!). I’ve never looked back. They grab and hold dust, hair, grime, and moisture. Plus, you can just pop them in the washer and dryer and use them time after time. They also come in pretty colors which always helps any endeavor.

Car Drying Cloth for the Shower

Spring Cleaning Tips, Tricks, and Tools for Easier Cleaning | www.rappsodyinrooms.com

This is a newer trick that I started after reading my friend and fellow blogger Jena’s tip on how she cleans her shower. Basically all she does is wipe it down after every shower. That’s it. I thought, “Hey, I could do that.” Let me tell you, of all things I hate to clean, I hate to clean the shower. I’m not really sure why, but it’s the thing I procrastinate the most. So this quick tip changed my world. However, I didn’t have the room to hang another bulky towel in the bathroom. Then my car loving hubby came to the rescue again. He uses great little cloths that pack major drying punch. That could fit in my bathroom.

Let me tell you, after a few weeks of doing this, I am thrilled with the results! My shower has never been cleaner! Wahoo! Best. Tip. Ever.

Three-in-One Cleaning Cloth

Spring Cleaning Tips, Tricks, and Tools for Easier Cleaning | www.rappsodyinrooms.com

This is a newer trick that I’m trying out. It is a three-in-one microfiber-esque mitt for cleaning. One mitt for everything. It works great for those quick touchups and 5 – 10 minute cleaning sprees. Plus, you can throw it in the washer too!

Pillow Case Fan Cleaner

Spring Cleaning Tips, Tricks, and Tools for Easier Cleaning | www.rappsodyinrooms.com

World changer right here. We are avid fan users in the house. We like a cool breeze on our face, especially at night. However, you would think that using a fan frequently would make those pesky fan blades be dust bunny free. Whatdya know, it’s the opposite. The fan we use the most has piles of dust on it (it’s getting real in here now). Yet, I hate cleaning fans because it just makes a huge mess…that is, until I realized that the pillow case was the perfect dust trap. All you do is slide the pillow case onto the blade and then wipe it down. All the dust is them caught cleanly in the pillow case.

My Homemade Green Cleaners

Spring Cleaning Tips, Tricks, and Tools for Easier Cleaning | www.rappsodyinrooms.com

I went over my recipes for green cleaners in the home, and I can’t say enough about them. For those of you (who were like me just a few weeks ago) were skeptical, do yourself a favor and just try. These are so easy to make! I was stunned by their efficiency and cost savings.

My #1 Tip to Quick, Consistent Cleaning

Now this tip is the number one reason that I find cleaning so much easier now. I used to use wet sponges to clean everything. It just took so much more time and was much more messy. With every surface dry you can quickly spritz down a surface or rag (lightly) and sweep your microfiber over it. Zip, zip and you’re done. I found this approach so much more attainable every couple of days. It didn’t feel like a big clean. Doing this can take a daunting chore of cleaning a whole bathroom into a quick little wipe down.

Now it’s your turn! Comment below to share your favorite cleaning tip to help us get our households clean and tidy, quick and easy!

  • Susan

    Excellent ideas! I am off to buy a stack of microfiber cloths!ReplyCancel

    • Thank you! Get ready to have your cleaning routine be transformed with the micro fibers!ReplyCancel

  • Great tips! I am going to try your pillow case trick for cleaning fans. That’s a great idea! My father-in-law taught me to wipe our shower dry with a chamois cloth. I have no mildew and my shower doesn’t need cleaning. I need to look for that mit. Where did you get it?ReplyCancel

    • Thanks Paula! I love your idea of drying your shower with a chamois cloth. I got the mitt at Walmart actually in the cleaning section!ReplyCancel

  • Do you ever use the blue dawn and vinegar In your shower? I clean homes as a side job and this little trick has changes my life! So easy spray on before I start and wipe off when Im done! Love eyerthing you have done:)ReplyCancel

    • Oh thank you so much for sharing! That sounds like a great trick! I’ll definitely have to try it out!ReplyCancel

  • Trish Vallely

    What’s the ratio of blue dawn to vinegar?
    I’d like to try that.ReplyCancel

With warm weather perking up, spring fever has definitely hit this girl! I’m so excited to open our house windows wide and breathe some fresh air into our home. I’m also excited about not having to wear big heavy coats. I even peeked at my spring and summer clothes hidden away in the closet and got excited about wearing my bright colored pants again!

Another item that comes around in the spring is cleaning. It is the time when we air out the house and welcome in new, fresh starts as blossoms and buds spring to life.

This year, to welcome spring, I decide to try making my own cleaners. This is a trend that I’ve seen around but it always just seemed too complicated. With the vast array of cleaners available on the market and the ever expanding “natural” and “green” cleaners, it always seemed easy to just grab a bottle at the grocery store and go on my way.

Except I started researching how to make natural cleaners at home and I realized that it is very simple. So simple it only takes four ingredients to make most of the cleaners I need. Four ingredients that cost very little. The money savings reeled me in. Then, after making and testing them I was sold.

Homemade Natural Cleaner Recipes with only 4 Ingredients | www.rappsodyinrooms.com

First, they were SO easy and quick to make. Second, they do not have an odor.

Hallelujah, I didn’t feel like I was breathing fumes for while I was cleaning. The natural ingredients also make me feel better when cleaning in the kitchen –  plus if you have pets and/or kids you don’t have to be worried about them getting into toxic cleaners. They may not taste good but if eaten they cause no harm.

I am officially sold on making my own cleaners. Some I will still buy, but the following are too quick, easy, effective, and cost effective that there is no reason for me not to use them from hereon in.

All-Purpose Cleaner

Mix equal parts of vinegar with water into a spray bottle. Add a few squirts of lemon juice.

I use this cleaner for most everything – glass, countertops (marble, granite, and other specialty countertops have specific cleaners – doublecheck counter specifications), toilet surfaces, floor touch-ups, etc.

Toilet Bowl Cleaner

Pour 1/4 cup of baking soda into the toilet bowl followed by 1 cup of vinegar. Let fizz and sit a couple of minutes. Then scrub and flush.

This is my favorite way to clean toilets! It is like a science experiment in the bowl when it fizzes like crazy! Dare I say it makes cleaning fun?!

Wood Cleaner/Polish

Mix two parts of olive oil with 1 part of lemon juice. Rub into furniture. Make sure to wipe off excess.

I used my glass bottle project to make this mixture. It worked great!

Drain Cleaner

Pour 1/2 cup of baking soda down the drain followed by 1/2 cup of vinegar. Let fizz and then flush with hot water.

Another fun science experiment type of cleaning! I boiled a kettle of water and poured it down the drain to flush the mixture.

Stainless Steel Polish

Rub straight olive oil onto stainless steel surface. Make sure to buff off.

I also have some new tricks I’ve come upon to make cleaning easier – as well as new tools to make the job easier – that I’ll be sharing later this week!