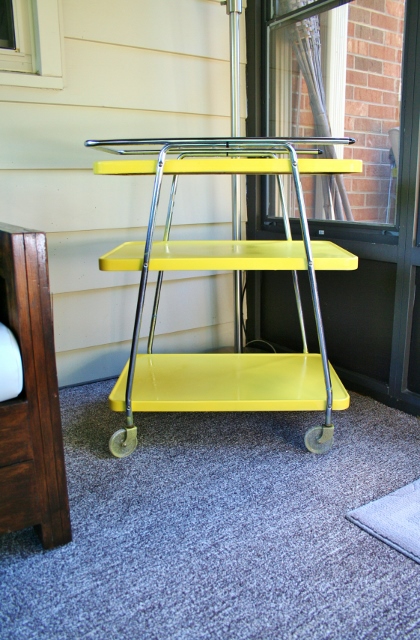
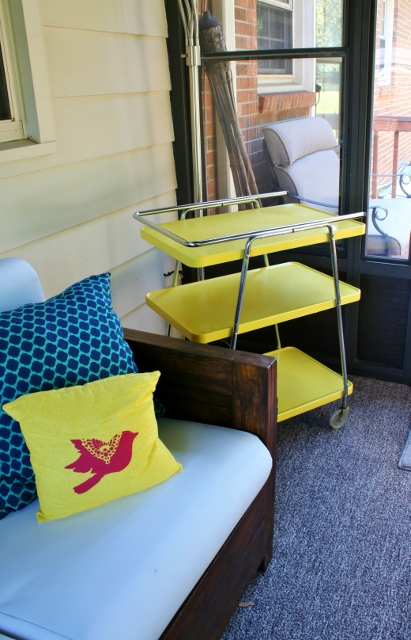
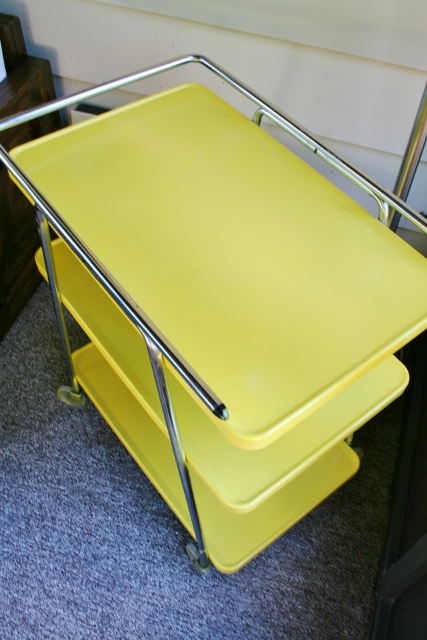
Remember when I bought a pretty little yellow cart at an antique shop earlier this summer? She had pretty retro lines and sparkly wheels and was destined for the sun room.

styling-a-grill-cart

styling-a-grill-cart

styling-a-grill-cart

Well she was pretty all on her own but I needed her to pull a little bit more weight. My idea in buying her was for her to have a multi-function job. I saw her working as a side table in the sun room, holding drinking, magazines, and other pretty things. I also saw her as being wheeled out onto the deck when we need a surface for grilling. Then, when I made the charcoal holder from a popcorn tin, I knew that the yellow cart would hold that too.

So I do whenever I start styling something – I gathered a huge pile of possible items to work with.

styling-a-grill-cart

Then I just start playing with what looks good, all while keeping in mind what I saw the car functioning as. After a little while I hit upon a pretty and functional style that sat well with me. So much that I sat in my loveseat and just stared at it smiling. I know when that happens that it works.

styling-a-grill-cart

styling-a-grill-cart

The first shelf holds a lantern (from the clearance section in Michael’s) with a Dollar Store candle that I wrapped washi tape around to dress up.

styling-a-grill-cart

styling-a-grill-cart

The “R” was also from the clearance section in Michael’s. I wanted a coaster for the cart so I decided to Modge Podge the “R” and use that as a coaster.

styling-a-grill-cart

The frame was $0.45 at a local thrift store. I really dove into the archives for the family picture from the 90’s. It was my first trip out of the country. The whole family went to England and Scotland. Ah the fashion and hair in this picture. Amazing.

The succulent pot was from a yard sale with a clearance succulent from Lowe’s.

styling-a-grill-cart

The middle is a stack of magazines for easy reading while lounging on the love seat. The wooden buffalo was a thrift store treasure that I fell in love with immediately.

styling-a-grill-cart

styling-a-grill-cart

styling-a-grill-cart

styling-a-grill-cart

The geometric bin was a $1 find at Wal-Mart of all places. It’s empty right now but I’m thinking it will hold napkins for parties out there. The colors were just so perfect for the room (and they were such a good deal I bought $4…not sure where they are going to go).

styling-a-grill-cart

The last shelf holds the charcoal container.

styling-a-grill-cart

styling-a-grill-cart

styling-a-grill-cart

There it is, my styled yellow cart! I’m working on paring things down and not over styling. I like that there are interesting items on the cart but it’s not too much. Do you have any styling tricks?

Sharing This Post Here:

  • Love that each of the pieces make perfect sense and look great with the cart! Beautiful work!ReplyCancel

    • Thank you so much! It was really important for me to have function and style on this table. I’m tired of just having stuff and clutter – something I know you’re familiar with! ReplyCancel

  • paulasweetpea

    You did a great job of styling your cart. I know it will be handy to have the charcoal nearby when you are ready to grill.ReplyCancel

    • Thanks Paula! I am SO glad to have a place for that charcoal. Seriously, it floats around our house like nothing else! Or is has for the past few years. No longer!ReplyCancel

  • Great find! I’ve been hunting everywhere for something like that for our patio because we are in desperate need of a side table or something to go next to the grill. I hadn’t thought of a cart. Love this idea!ReplyCancel

    • Thanks Jena! It was just one of those great finds when I wasn’t looking for it. However, I had thought about attaching castors to other tables that would work. Or, there are loads of old TV stands on wheels that could be great!ReplyCancel

  • […] get better at styling (like when I styled the love seat four different ways and how I styled the yellow grilling cart) so I once again set out to do my styling […]ReplyCancel

  • This is great! I’d love to have you share your October organizing tips at my monthly Home Organization Ideas Link Party – it just opened!

    http://www.itsoverflowing.com/2013/11/home-organization-ideas/ReplyCancel

My goodness, I love the possibilities that a popcorn tin holds. First, it holds hundreds upon hundreds of delicious kernels of joy. Yum. One of my favorite parts of the holidays. But then it gets empty and then what? Joy over? No my friend, no! You saw I already made one can into an organization holder for my closet makeover. Now I have another use for one:

popcorn-tin-upcycle-charcoal-holder

Yes, I am making a charcoal bin out of a popcorn tin. Rhymes help motivate me. We like to keep it old school with using a charcoal grill.

charcoal-grill

Our charcoal floats around the house. It usually lands by our back door by our kitchen table. Sometimes it floats in the sun room (but not recently since that room is too pretty for it now). Other times it gets left out in the rain (oops) where I later find it ruined and make some of my own flames with my anger (that stuff is expensive!)!

I decided in my sun room planning that we were to have a cart that would be wheeled in and out of the sun room for easy grilling. And on that cart I was determined to have the charcoal. Except for charcoal bags are ugly so I was determined to have a pretty charcoal container. Enter, my co-workers empty popcorn tin (since mine had already been used).

popcorn-tin-upcycle-charcoal-holder

This time the can got coated in navy blue paint.

popcorn-tin-upcycle-charcoal-holder

After that dried I attacked it with washi tape again (see, I told you Wednesday it was here to stay) around the top of the container. The width was just perfect.

popcorn-tin-upcycle-charcoal-holder

Then I was so excited to try out this product: clear chalkboard paint. Hurray!

popcorn-tin-upcycle-charcoal-holder

I did my happy dance in the middle of Michael’s when I spotted this. I love chalkboard anything but don’t love the black look or don’t get excited about having to try to make some. This just coats right over any surface and dries clear!

According to directions you apply one coat horizontal and one coat vertical (with an hour dry time between). I did that, waited until it dried, and then taped out a border for it (yes, in washi tape) so it looked more like a label. Then, I put one more coat just to make sure. It’s easy to doubt this stuff since you can’t see it (and therefore I don’t know if it is working or not).

After that cures for 24 hours you need to ready the surface by rubbing chalk all over it. This way your first drawings on it won’t be permanently ingrained in the surface (knowing me the first marks would be hideous looking letters).

popcorn-tin-upcycle-charcoal-holder

Then you are all set to go! Draw away!

popcorn-tin-upcycle-charcoal-holder

popcorn-tin-upcycle-charcoal-holder

popcorn-tin-upcycle-charcoal-holder

popcorn-tin-upcycle-charcoal-holder

popcorn-tin-upcycle-charcoal-holder

popcorn-tin-upcycle-charcoal-holder

Goodbye ugly charcoal and hello pretty container! Even if we leave it out in the rain it’s safe. Now, no surface is safe from my chalkboard paint obsession!

Sharing This Project Here:

Washi tape, washi tape, everywhere! Basically, that’s what I see, from walls to toe kicks this is a trend that is sticking (hah). Since it can come in so many different colors and patterns, it’s also a trend that can adapt to other trends. So I am embracing one roll at a time.

Through my meanderings through Pinterest the other day I hit upon this votive idea that I thought was too cute – she wrapped washi tape around votive candles to spruce them up!

I also thought it would be a great fit for a votive holder that I have hanging around the sun room.

washi-tape-votive-candle

washi-tape-votive-candle

So out came my collection and in no time these  candles were wrapped in beautiful paper tape (which is all washi tape basically is).

washi-tape-votive-candle

washi-tape-votive-candle

washi-tape-votive-candle

washi-tape-votive-candle

After I finished making these  candles oh so pretty, I put them back into the holder – sans blue rocks this time. It showcased the beauty of them so much more.

washi-tape-votive-candle

washi-tape-votive-candle

washi-tape-votive-candle

washi-tape-votive-candle

Boom. Done. Now that’s a quick and easy project!

Everyday we’re shuffling, shuffling…in the living room. It’s always been somewhat of a challenge in our house – we’ve always wanted to have more seating in there. You saw how we did some shuffling with the layout after Christmas last year and resulted in this layout. Here is what it was looking like after that layout change.

www.rappsodyinrooms.com

Well, we were definitely liking this layout and enhanced seating, but the chair on the left wasn’t always the best fit for how we live. Basically, it wasn’t a good hang out in the living room and get comfy chair. So we tucked that away in the back of our minds and somewhat haphazardly would check out chairs every once in a while.

Then, Target stepped up our timetable. We were there this weekend for nothing home related, yet I always like to browse through that section. Eric and I split up to check out the different departments. Once we found each other again Eric said, “Hey, did you see that herringbone grey chair?” Oh yes I did! I had actually stopped to look at it earlier, thinking it was a good-looking chair. It’s rare that Eric speaks up about buying something house related without me prompting him. Then there was the extra bonus that it was on sale (bummer, it’s not anymore), I was sold – times two! Yup, we thought that we would try to increase our seating even more with two chairs.

Here is our new arrangement that we are loving (although still tweaking with accessories and pillows).

new-living-room-arrangment

new-living-room-arrangment

new-living-room-arrangment

new-living-room-arrangment

Yes, that’s a robot. Yes, Eric put that robot there. Yes, this is what makes our marriage work. #compromise

new-living-room-arrangment

new-living-room-arrangment

new-living-room-arrangment

new-living-room-arrangment

Eric and I are both loving the herringbone pattern and the extra seating it brings to the room. Now, we’re on the hunt for a new rug. Fun living room spruce-ups! (Remember it was on my 2013 goal list?!)

  • LOVE those chairs! And the robot is pretty cute too!ReplyCancel

    • Haha. Thank you…for both the chairs and the robot. Eric will be pleased with all the robot love!ReplyCancel

  • haha! you have a robot, I have a monkey carved out of a coconut. total compromise!ReplyCancel

    • Haha! Awesome! I wonder what other people have. That could be an interesting convo. Anyone else?ReplyCancel

  • Those chairs are gorgeous! And the pillow is perfect!ReplyCancel

    • Thanks! I’m glad you like the pillows! I wasn’t sure if I was going to like mismatched but I think they both look good too!ReplyCancel

  • paulasweetpea

    I love both they style and fabric on your new chairs. They are a great update for your living room.ReplyCancel

    • Thank you! Yay on design choices with your husband that you both like!ReplyCancel

I’ve found a pattern in myself. It’s always the quick and easy projects I seem to put off. Especially those that smack you in the face every day. Why? I guess I like a challenge (!?). There’s no rhyme or reason to it, but every time I finish up one of those simple projects I say to myself, “Self, why the heck didn’t you do this eons ago?” Then my Self just kind of sits there and grins at me, mockingly. Enough inside my internal conversations, let’s get to the project!

This project involved our outdoor front door lights.

spray-painting-front-lights

spray-painting-front-lights

spray-painting-front-lights

I never liked them. They were a rusty red. In fact, I thought that they were rusted so I was planning on just replacing them. We actually had narrowed down the lights we were going to buy. Until my spray paint trigger finger got a little feisty and I said to my Self, “Why don’t we give this whole spray painting idea a little whirl?” That’s about all it took for me to get excited about the idea and run to the store to buy Valspar indoor/outdoor black satin spray paint.

spray-painting-front-lights

First I cleaned up those incredibly filthy lights. I couldn’t really tell since that rusty red color just always looks dirty, but there was definitely a lovely layer of grime all over those suckers. Amazingly enough, I liked them less once they were clean. A little too speckled for my taste.

spray-painting-front-lights

spray-painting-front-lights

The hardest part (although it wasn’t really hard) of this project was actually the prep work (it always seems to be this way). I wanted to ensure that I didn’t get black paint all over our brick so I did a two-step prepping process. First, I used painters tape to tape around the base of the lights. Yep, those suckers are staying on the wall. It’s easier that way.

Then, I ripped up some plastic bags (phew, good thing I had some left over from my plastic bag pillow stuffing endeavor) and tape those around the lights. Gotta watch out for that over spray! Make sure you tape up the inside of the lights too around the socket. I stuffed newspaper in them and then taped over them.

spray-painting-front-lights

spray-painting-front-lights

Finally I was able to get to my favorite part of this project – spraying them down. Well that went quickly (under a minute for each light) and used almost no paint. That’s a win!

spray-painting-front-lights

spray-painting-front-lights

spray-painting-front-lights

After letting them dry and doing a few little touch-ups, these bright lights were back in business!

spray-painting-front-lights

spray-painting-front-lights

Isn’t it amazing what the little touches do to a home? I love how the black light fixtures and black shutters really help bring the front of the house together.

spray-painting-front-lights

spray-painting-front-lights

Can you spy the photo bomber in the next few pictures? I had no idea this was happening while taking the pictures. I guess I was too focused on the light fixtures. But these ended up being my absolute favorite pictures.

spray-painting-front-lights

spray-painting-front-lights

spray-painting-front-lights

Not bad for a $4 can of spray paint and under an hour’s worth of work! Let’s see the before and after just one more time.

spray-painting-front-lights

spray-painting-front-lights

spray-painting-front-lights

spray-painting-front-lights

  • Much, much better! What a simple thing that makes such a big difference!ReplyCancel

    • Thanks Catherine! I’m so happy with the result!ReplyCancel

    • Susette

      Where did the Hello on the door go???ReplyCancel

      • Haha. I was wondering when someone was going to comment about that! Well we are in the process of still debating it in our household. Eric’s been on the fence on if he’s a fan of it so initially it was just taped up to get a feel for it. But I’ve been meaning to actually just put it up!ReplyCancel

  • Jeanette

    I am a late comer to following your projects. I like what you have done with your space and projects you have done to lift the spirit of the sun room. I believe you have not only lifted the spirit of the sun room but yours and now mine for sharing what you are doing. It is truly an inspiration! Really like the care in detail you are showing in not only the process for the project but doing it in clear pictures step by step. Your bright sunny attitude and style is starting to show through and making a place that is fun and enjoyable to be in. These are jobs well done Megan, keep up the good work. Love the way the front porch lights turned out too. I agree with you, that red speckled did not do much for the look of the porch. The black is a nice touch.
    I really got a good giggle out of the face in the window of the door! My opinion for what it’s worth is put hello on the door. Your family members will come to love it in time and will be glad you did. It is a good marker for describing your house from the neighbors to first time guests.
    Suggestion for your craftiness is to make a beautiful wreath or wall hanging with the red, black, sparkly gold and fall colors bringing in other colors from the porch to hang beside the front door. Pinterest has some very nice ones with instructions when you click on it. Keep up the good work my crafty friend! Love seeing your progress!ReplyCancel

    • Thank you SO MUCH for your wonderful comment and all your great suggestions! I totally agree with the “hello” going back on the door. The wreath is a great idea too. I do need to do something for fall! I’m also so glad you think I lifted the spirit of the sun room and our house. That just warms my heart! I want to lift spirits everywhere! So glad to have you as a reader!!ReplyCancel