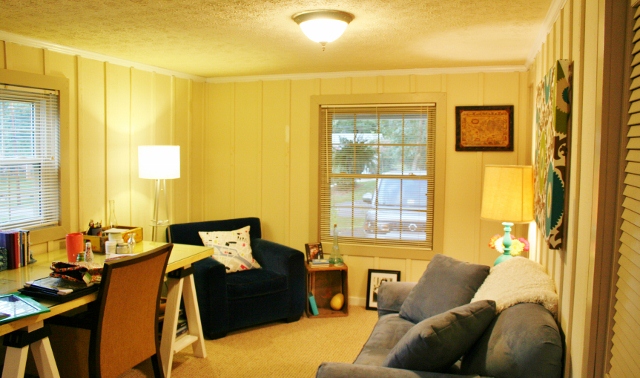
It’s done. I finally did it; and I said I would never do this. Then I changed my mind, and now I have a green wall. Yup! I have finally painted the crazy wooded walls of the Mego Cave. You may recall my arduous hemming and hawing journey as I picked a paint color here. And only Eric can recall that ever since I set foot into our little ranch-o house, just looking at the walls in this room and thinking about painting it would give me a twitch. You know, the twitch that happens when you really don’t want to do something? Well I twitched at the thought of painting these walls. That is, until the random carport room became the Mego Cave, and I began adding lots of pretty little things like this fabric artwork piece, this electric blue free chair, and a super cool door/desk. Things were looking so pretty against drab, non-colored walls.
Just take a look for yourself (check out the whole “before” tour here):
Eww. To think that pretty much our entire house used to be that color! It definitely takes away from the impact of the pretty things in the room. It makes them, well, look less pretty and drabs them down with the wall color (that’s a pun, not a type-o). So I took the plunge, picked the color, and spent hours upon hours (and two cans of paint) getting paint in my hair on the walls.
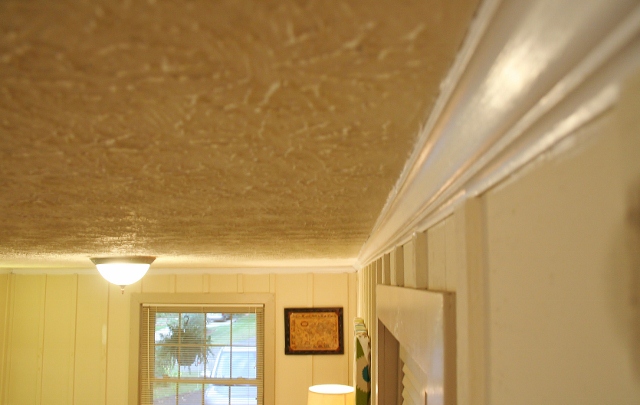
The first step in painting this room was to paint the trim. I am a sucker for fresh, bright white trim, especially in this room since it has such nice wide trim. Let me tell you, it took quite a few coats to cover the dark colors on the trim and doors. Although I did take the easy way out and spray paint the closet doors. I’ve just found that it is easier that way.
Check out how the white trim already brightens the room and makes the non-color actually look more like a color. Got to love contrast to make a room more dynamic!
Then it was time to actually put the paint on the walls. It was an interesting process. I still did the same method I usually do: cut in and then roll the rest. This time there was just a lot of cutting it up with the paint brush. First, I to do hundreds of corners. I am not exaggerating this. Batten board paneling has two corners about every 8 inches, and this is a long room. Then I painted around the trim on the top and bottom and around the window and door trimming. After all that cutting time, I was able to roll, which is always usually the easy part. I ended up getting a roller made for rough surfaces because of how uneven the wood is (gosh, I have never appreciated dry wall before this)! It took a little more arm power to get a nice, even coat on the rough wall. Sometimes I had to go at a few more angles to make sure I didn’t miss any spots. The wood also sucked up the paint pretty quick, so I had to go back to the pan quite a bit.
Once coat one was done, I threw up my hands and called her done! Usually, I am hard-core on painting two coats. If you are already going to be painting, taping, moving stuff, and going through the process of painting, just do it right the first time. Except for this time. I don’t think I am taking the lazy approach either, because of how much paint it took to cover up the walls, one coat was enough. Hurray for small victories! Since it took me two weeks to get to one coat (and trim) finished, this definitely cut down on the project time (and my sanity at this point). Overall I would estimate the trim took 6 hours (I’m telling you, it was at least three coats of my semi-gloss white) and the walls took about 10! That’s a grand total of 16(ish) hours of painting that room. Wow, now that I add that up, I’m pretty impressed!
Without any further ado, here is my pretty little room in her Valspar Tempered Spring in flat.
Just so you get the dramatic new effect, let’s do some before and after shots.
Now for full disclosure, even after my whole paint picking process, I am only about 85% in love with this color. It is definitely better than what used to be there, and it accomplishes the purpose of making the room look fresh, bright, and inviting. Most of the time I love it, but there are other times where I feel like there is something a little off with the color. However, I am not painting the room again (if I decide to) until new lighting is put in the room. After changing the lighting in the kitchen and learning how lighting can change pretty much everything about a room (how it looks, feels, how every object in the room looks different) I will not make any hasty decisions. I have noted that I don’t like the color more at night, when there isn’t natural light in the room. I am also acutely aware that the light in the room casts a terrible yellow glow. Yuck. You can actually tell in the picture above how much more yellow the desk side looks compared to the dining side.Old yellow glow + fresh, bright green = Megan’s eye twitch (again). I’m saving my pennies and bills now so I can liven up the lights in the Mego Cave!
So what do you all think? You can be honest, since it can’t get worse than one co-worker’s opinion when I showed her the color. Her immediate reaction was “I HATE that color!!!” Although, I will say that she a) was having a bad day and b) had some weird pent-up paint frustrations going back to her childhood about this shade of green.


I love it! You’re so right about fresh, white trim. It makes everything else pop!
Thank you! I definitely think the white trim is my favorite part of the makeover!
I love it, Megan! I was partial to the color to begin with, but it is a color that reminds me of you and looks fresh and bright and happy!
Thanks! I think I love it too. I loved it on the paint sample, but having the walls full of the color is a little different. It definitely grows on you though, and I think I am almost at love. Especially when I get those light fixtures changed out!
[…] were these glittery crystal door pulls. I had been searching for the perfect door pulls for the newly painted closet doors in the Mego Cave. These sparklers were just perfect (and $5 apiece as well). I grabbed these up in a heartbeat and […]
[…] room, but it is a finishing detail to the room. I have been so focused on big projects recently (painting the carport room, installing a backsplash, painting the kitchen, etc.) that I haven’t been able to get to a lot of […]
[…] the first time. Now it isn’t a guaranteed win (oh Mego Cave, I still don’t know about your pale green-ness) but it takes away the surprise of, “What?! This paint color was totally different on the paint […]
Hopping over from Bower Power. 🙂 Just wanted to say I like the green!! 🙂
Shannon
Fabulously Vintage
Hi Shannon! Thanks for stopping by! Also, a big thanks on the postive feedback about the green. I think I’m going to stick it out with it. It’s definitely growing on me and it’s not a color you see all the time. I like being a little different!
PS – Stopped by your blog and love it!
[…] and sewing on all those little rings. After a few months of sitting on the materials, and then a painted Mego Cave later, I didn’t even want to use that fabric anyone (there was a case of the green clash and I thought […]
[…] Mego Cave: The Full Paint Reveal – This feels like a huge accomplishment to me, since it was such a big paint job. It was also one I […]
[…] permeate every room in our house (check out our kitchen before and after and how the Mego Cave was transformed by a coat of paint, just to show a few examples). After the colors had started coming together in the Mego Cave, I […]
[…] Painted the trim and walls […]
[…] the new wall color, this fabric wasn’t working. The two greens just weren’t jiving right for me. I had […]
[…] Painting the room • A new door desk • A side of the road chair • Two new rugs (here and here) • Two new light […]