Guys. I read a book. Actually, I read FOUR books within the past two weeks. Excessive reading? Yes, but it’s been a while coming.

See, I haven’t been reading because I’ve been blogging. I’ve been thinking up projects, working on projects, buying things for projects, photographing projects, writing about the projects, and publicizing the projects. Don’t get me wrong, I love projects but that is a lot of emphasis on projects. And a lot of emphasis on nothing else.

There actually came a point when the blog started dictating the projects instead of the house dictating the projects. That didn’t leave me feeling excited. Yes, I loved the result (most of the time) but it felt like work – instead of the excessive happiness I used to get in finishing a project that adds to the happiness and beauty of my home, my life. And I think that’s wrong. That’s wrong for you, that’s wrong for me, that’s wrong for the house.
I think a change will do me good | www.rappsodyinrooms.com

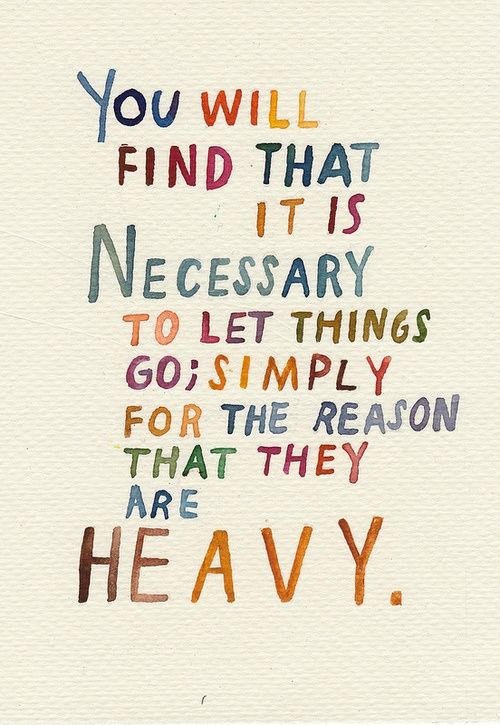
I don’t need to clutter my house, your brain, my blog with things I’m doing just to say I’m doing them. I want to share things that I can’t help but share because I’m so excited about doing them. Projects I’m doing that are something that will add value or beauty or happiness to our home. Projects that pull me off the couch, onto my feet. Not project after project that weigh me down.

I don’t know when it changed, but it did. I started this blog because I wanted to write and share projects, recipes, travels, thoughts that were on my mind and that I thought you might enjoy those ramblings too.

I think a change will do me good | www.rappsodyinrooms.com

Then I fell head over heels in love with blogging and things got serious. Maybe a little too serious, a little too fast. I thought, “I want to do this all the time! I want to make this my career!”

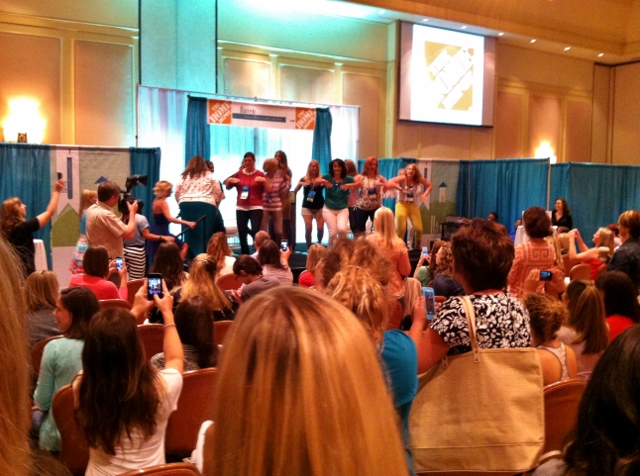
I started reading blog books and articles, attending conferences, and trying to figure out how I could grow this blog into something big.
haven-conference-2013

Needless to say, that didn’t happen. It’s been growing but it didn’t explode into this hugely read blog over the past year or two. Even though I’ve been following all the blogging “rules” and busting my butt every single week night and weekend to churn out content.

I guess that’s when the honeymoon period ended for me. The thought of using all my free time (nights and weekends for this 8-5’er) to make things, blog about them, and publicize them hoping for that one big break just wore me out. Just thinking about it wore me out. I wasn’t excited to get up, get my paint brush, and get to work. The thought of opening my laptop and pressing the on button exhausted me.

I think it boiled down to that I got scared. Scared about the thoughts I had about quitting my blog. Scared about thoughts about all this work going down the drain. Scared that my future plan/dream of this blog really going places was over. Scared that I really didn’t have a plan. Scared that what I was doing wasn’t good enough, beautiful enough, original enough, creative enough.

I think a change will do me good | www.rappsodyinrooms.com

I’ve had these thoughts revolving around my head for months. Trying to figure out what I wanted for the blog. What I wanted for the future. What the point of the blog was. What its purpose was. What my purpose was. What its motive was.

I started asking myself what this blog was giving to the world? Was it adding clutter? Adding beauty? Trying to be something it wasn’t? Trying to be someone else’s vision?

So I’m making changes.

I’m only going to post about projects that I’m really excited about, that I really want to do around our house, posts that I think may be helpful to you – or at least entertain you. I am going to stop posting just because I think I’m supposed to post at least three times a week. Heck, getting three projects a week out of a small weekend usually doesn’t fit well into my life.

I think a change will do me good | www.rappsodyinrooms.com


I’ve been living in a project ridden, slightly messy, kind of unorganized, not the cleanest house these past couple of years for the sake of the blog and doing projects. What?! When my blog is about DIYing, beautifying, organizing, and cleaning, how in the world does that make sense?

I need to streamline my life, my house, my stuff, my blog. It’s time to get rid of clutter everywhere. I don’t want piddly projects here and there. I was substance to surround me everywhere – that includes my home, blog, job, life. Plus, I want to enjoy my home too.

So my blog is getting a little late spring cleaning. I’m still definitely here. I’m still 100% in on this blog thing. Heck, I may be even more than 100% because I’m stripping away everything that isn’t me, isn’t fun, isn’t worthwhile. I’m not going to be following rules that haven’t really been working for me. I’m going to stop comparing myself, my blog to others and trying to mimic their success. That isn’t me – literally.

It’s time to just strip it down to what is just me, my loves, my challenges, my travels, my life, my definition of beauty, my happiness.

I think a change will do me good | www.rappsodyinrooms.com

Doing that for me seems like the best thing I can do for you too. That way you aren’t seeing cluttered content just to be content. You aren’t seeing regurgitated content just to get a post up. What you are seeing is real, passion, happiness, excitement. Hopefully that will be content you connect with, get inspired by, laugh with.

I’m here, perhaps just less. We will see. I will let life dictate my time and my projects. This 60’s ranch house still has a huge long list of projects that I am excited to do and excited to share. Plus, I have this other small dream that I am cultivating too. But that’s a dream of another day, another blog post.

That means I’m off. I’m off to live life to the fullest in the moment. Whether that means I’m stoked to climb up into a closet, get paint in my hair, and paint a closet ceiling (spoiler alert) or it may be to enjoy a cookie in my favorite velour chair and read a book for hours in a row. Cause that’s where I am in life and that’s what I’m going to do.

I think a change will do me good | www.rappsodyinrooms.com

Hopefully, this change will be a good change for all of us. To go back to our roots, be happy for ourselves, and make that happiness, that excitement contagious.

Because happiness starts with you.

PS – As I look back at this post after writing it, it makes me think that I’m saying these things about my blog, but don’t these concepts apply to other jobs, activities, and life in general? It’s just not worth doing it if it’s forced, not you, not the best for you. So make a point to strip down your life to your essential loves and then rebuild from there. To stop doing what you “think” you should be doing or following some “rules” that aren’t right for you.

  • good for you for taking charge! i did that earlier this year and it felt better! i also started a little blogging book club with two friends if you want to join in the fun- we read just one book a month and it’s just one post a month which announces the next book and reviews the last. most importantly, it keeps me reading, which was a passion of mine i was also putting aside for blogging. i am so glad- i can make time to read just one book a month. 😉 i am almost done june’s book and it’s only june 9 so i feel good- i might even get another book in this month!ReplyCancel

    • Thank you Cassie! It’s good to hear that from someone who has also taken charge. Yay! Taking charge of our lives (and blog)!

      The book club sounds like a lot of fun! What kinds of books do you read?ReplyCancel

  • I hear ya! I can barely crank out one post a week. I love blogging too, but it can be draining to come up with tons of fresh, new content. I think it was coming across to my readers, too, when I was just posting to get something out there. I feel much better about my content now that I try to post only when I have something I want to post! Are you still coming to Haven?ReplyCancel

    • Yes, I’m thinking about 1-2 posts a week of good content! I definitely think it comes across to readers too. It’s good to hear that you feel better about your blog/content. I do too (already)! And yes, I am definitely still coming to Haven! Can’t wait!ReplyCancel

  • Absolutely do what’s right for you! It takes courage to release our hold on dreams and make changes, and it sounds like it’s time. Everything will work out beautifully, and I’ll come by to see what you’re up to — regardless of whether you’re posting once a week or once a month! 🙂ReplyCancel

    • Thank you so much Meg! Reading this has just made my day! Thank you for your wonderful words of encouragement!ReplyCancel

My sister lives in the beautiful, golden weather, no humidity, wild-fire ridden state of California. I showed you her gorgeous home in Southern Cali when I went to visit a few years ago, along with some of her beautiful backyard.

However, I didn’t show you a pic of this part of the backyard.

Jackie

Actually this is a picture she texted to me recently with a plea, “HELP! Looking for inexpensive ideas to make this backyard corner beautiful!”

So I thought I would give some ideas here on the blog and also ask you for help too! Please leave a comment below with your ideas!

First of all, I think we need to dress up that concrete wall a little bit. My first thought was to make a pallet planter (or two or three) to add some lushness and greenery to the concrete wall.

Pallet PlanterOr if she wanted to make the planter look more integrated into the wall she could do a cinder block planter. This could also go on the opposite wall as well.

Cinder Block Planter Wall

I also like the idea of using cinder blocks to made a bench on either wall. Or you could put it in front of the fence and use it to stack pretty potted plants on and around. That would block the fence a little more. Also, I love that stenciled wall behind this bench. Not sure if she is into making that commitment though.

Cinder Block Bench

I also like the idea of outdoor artwork, like making artwork using vinyl outdoor tablecloths. You can definitely personalize it by choosing tablecloths in a color palette and pattern that you like.

Tablecloth Artwork

Another type of artwork are these neat metal starbursts. They are just a little decorative item but could bring some fun color.

Metal Starbursts

Also, I think it might be nice to gussy up the ground a little bit too. Perhaps plant it all with grass or hardscape it all (probably easier in CA). Perhaps take up the pavers there and put down pebbles or gravel.  Or just put those pavers or other pavers in there in a fun pathway. I really like these decorative pavers with gravel.

Decorative Pavers

I always love the idea of a fire pit but in CA where fires start when you just think about it, I’m not sure if that’s something she wants. There are a lot of great tutorials out there on how to make fire pits.

Fire PitOf course every back yard corner needs some mood lighting. I love these lamp-like fixtures that can be hung out of the way.

diy-clay-outdoor-hanging-lamps-1

These Mason jar solar lights are pretty rad too.

Mason-Jar-Solar-Lights-Tutorial-from-www_gardentherapy_ca_

I’ve always wanted to make these glow in the dark planters too. How cool are there? (The blog post actually talks about how they had a little trouble making them but also shares a link for awesome LED color changing planters for $15).

Glow in the Dark Planters

Of course there is also the classic outdoor string lights that always make a space magical. Target and Amazon have a great selection of these lights.

outdoor-string-lights-over-patioPhew! Those are a ton of ideas but I know there are lots more out there too.

Please share your ideas about how to spruce up this space on a budget! 

  • It looks like this area is a pathway from the driveway to the house. I’d suggest making a sidewalk there out of pavers set in gravel. On the wall, I’d find a climbing plant that will cling to the wall to make it not looks so bare. It looks like it’s hard to get grass to grow in this area, so I wonder if she could make it into a corner flower bed. I looked back at your post on her home and boy is it pretty!ReplyCancel

    • Great ideas Paula! Thank you! I will pass them along to her. I love the flower bed idea. Isn’t her home gorgeous?ReplyCancel

Welcome back to the third and final installment of patriotic week here on Rappsody in Rooms. On Monday we learned how to make adorable patriotic pinwheels; Wednesday delved into painting flower pots and using natural elements for decorations; and today may just be my favorite day. Today we are marbling with nail polish!

Marbling with Nail Polish | www.rappsodyinrooms.com

I’ve seen this trick before and always thought it had such beautiful and unique results. I also thought it would be perfect to use when decorating for holidays like Memorial Day and the Fourth of July because it a gorgeous way to infuse your home with red, white, and blue. Even though when marbling with red it goes more pink. So it’s more like pink, white, and blue. But the general idea is still there, right?

Materials:

  • Red, white, and blue nail polish
  • A disposable plastic or aluminum tray
  • Items you want to marble like tiles, paper, boxes, candles, vases, etc.
  • An old pencil or chop stick

Marbling with Nail Polish | www.rappsodyinrooms.com

Instructions:

Prepare your space with plastic bags so you have a space to put the wet items. You will want to toss the bags afterwards ‘cause this gets messy!

Marbling with Nail Polish | www.rappsodyinrooms.com

Fill the pan up with a couple of inches of water. Have your items to marble next to the pan.

Marbling with Nail Polish | www.rappsodyinrooms.com

Now we are going to start marbling but you are going to want to work quickly since the nail polish dries quickly on the water and will result in gummy, streaky, clumpy looks (trust me – I learned the hard way).

Pour a little bit of each color of nail polish on the water, one at a time. Experiment with how you pour. Sometimes I shook the color on in circles or back and forth or just randomly. The more you do it the more you will find which method of shaking you like and the patterns that result.

Marbling with Nail Polish | www.rappsodyinrooms.com

Take your item and dip it in the water. The item will take all the paint from the surface area that it touches so you will only get one large item and maybe two smaller items at a time.

I found using an old pencil or chopstick helps clean up the leftover nail polish from your last dip. It will be too dry to use again and will end with the bad, gummy results. Just swirl the pencil in the water and the old nail polish will cling to it. You always want to start your next dip with nail polish free water.

Marbling with Nail Polish | www.rappsodyinrooms.com

Once your item is dipped, lay it on the plastic to dry. The nail polish dries quickly so you can wipe the water off of it pretty quickly.

Marbling with Nail Polish | www.rappsodyinrooms.com

I definitely learned along the way. In the above picture at the upper right hand corner you can see my first attempts. Not so great. Then, going clockwise, it gets better and better.

Tips:

  • Don’t use glitter nail polish! I thought it would be a fun look but it doesn’t spread in the water and clumps up instead. It’s not a very good finished product since it doesn’t marble. [You can see the clumps in the picture above on the upper right hand corner.]
  • Round objects are slightly harder to do. I tried to roll (and use glitter nail polish) a candle and it just ended up looking like a kindergarten special (meaning random globs of paint galore). I found that dipping each side of a round object worked best (although you could see where one dip started and another ended). I think with a larger pan and more practice I could perfect the delicate roll with good results.
  • Wait until the marble pattern is how you want it to look in the pan. Whatever pattern you see in the pan will be what comes out on your object. I found that letting it whirl in the pan a few seconds instead of immediately pouring and then dipping got the best marble results. Just don’t wait so long that it dries!
  • If you mess up on non-paper items you can use nail polish remover to remove the nail polish and try again. I ended up doing that on the glass vase and one tile.

Cleanup:

  • I used the pencil trick as explained above to get most of the nail polish out of the water.
  • Empty the pan outside and NOT down the drain. Nail polish is sticky!
  • I used nail polish remover and a paper towel to clean out the tray I could since I want to keep it for marbling future projects. You could just recycle the pan instead if you’re done with it.

Marbling with Nail Polish | www.rappsodyinrooms.com

Marbling with Nail Polish | www.rappsodyinrooms.com

The tiles turned coasters definitely were my favorite! I love the look they created on that slick tile.

Marbling with Nail Polish | www.rappsodyinrooms.com

Marbling with Nail Polish | www.rappsodyinrooms.com

Marbling with Nail Polish | www.rappsodyinrooms.com

This marbling method is so fun and addicting. Now I want to go try out different colors on so many more objects around my house! I definitely see more marbling in my future!

Have you ever tried the nail polish marbling method out? I’d love to hear what you marbled!

Post shared here:

  • This is such a neat technique and I’d love to try it for myself. Your coasters will be handy for summer entertaining on your deck and porch.ReplyCancel

    • Thanks Paula! I highly recommend trying marbling! It is so much fun!ReplyCancel

  • Jean

    How did you hold the tiles to get the evenness across the top?ReplyCancel

    • Jean – all you have to do is dip it straight on to the water. The nail polish naturally sticks to the tile. There’s no huge skill needed or any real trick when using a flat object. Just dip and go!ReplyCancel

Welcome back to our second day of patriotic themed crafts! On Monday I showed you my simple to make (seriously, it’s just paper and staples) patriotic pinwheels that have been making our house look all sorts of whimsical red, white, and blue this week. Today is another fun and simple project that is patriotic but still on the subtle side of holiday decorating.

Painting a Patriotic Planter | www.rappsodyinrooms.com  #patriotic #redwhiteandblue #july4th #independenceday

Today I am showing you how I painted a patriotic planter.

Materials:

  • Pot (I chose a terra cotta pot)
  • Silver and Blue spray paint (I used metallic paints)
  • Painters tape
  • A plant

Painting a Patriotic Planter | www.rappsodyinrooms.com  #patriotic #redwhiteandblue #july4th #independenceday

Instructions:

1. Paint the pot silver.

Painting a Patriotic Planter | www.rappsodyinrooms.com  #patriotic #redwhiteandblue #july4th #independenceday

2. Tape off stripes. I decided to do vertical.

Painting a Patriotic Planter | www.rappsodyinrooms.com  #patriotic #redwhiteandblue #july4th #independenceday

3. Paint blue and then peel off when dry to the touch. Plant your plant and display it proudly!

Painting a Patriotic Planter | www.rappsodyinrooms.com  #patriotic #redwhiteandblue #july4th #independenceday

Painting a Patriotic Planter | www.rappsodyinrooms.com  #patriotic #redwhiteandblue #july4th #independenceday


Painting a Patriotic Planter | www.rappsodyinrooms.com  #patriotic #redwhiteandblue #july4th #independenceday

I think silver can be substituted for white in most cases when decorating for patriotic holidays – plus it also brings in a more metallic look which is always a win for me.

Painting a Patriotic Planter | www.rappsodyinrooms.com  #patriotic #redwhiteandblue #july4th #independenceday

The red was brought into the project using petunias, which is something that I love to do. You can decorate with natural elements and a lot of the time it makes a more elegant look.

Painting a Patriotic Planter | www.rappsodyinrooms.com  #patriotic #redwhiteandblue #july4th #independenceday

Plus, don’t forget when decorating for holidays to shop your house for items that are red, white, and blue. Apart they aren’t patriotic but together they combine for a patriotic display. I brought in a hand-crocheted blanket that I made in middle school, another planter from the porch, and my two new deck chairs (from Ross)!

Painting a Patriotic Planter | www.rappsodyinrooms.com  #patriotic #redwhiteandblue #july4th #independencedaySharing this post here:

  • Love your patriotic display! Your pot might make a pretty candle holder for your porch with a chunky candle after you’ve finished using it as a planter.ReplyCancel

    • Thank you Paula! That’s a great idea about the chunky candle. I may have to give that a try!ReplyCancel

Hi everyone! Happy Monday! I hope you all get to enjoy a long weekend as we honor those who have served our country. Thank you all for keeping us safe. This day is for you!

This week we are going to keep the patriotic theme going, as it is Memorial Day week and the Fourth of July isn’t too far off either! If you’ve been reading this blog much you’ve probably noticed that we do Christmas decorations up big but other than that holidays come and go with nary a decoration. I say it’s because we go all in for Christmas and run out of steam for the rest of the year. Or, in my opinion, I’m not into the theme-y decorations too much. With that being the case, I thought I would do some more subtle patriotic decorating.

How to Make Patriotic Pinwheels | www.rappsodyinrooms.com

First up this week is a simple patriotic pinwheels tutorial. Pinwheels are pretty popular these days but I’ve haven’t made one since grade school craft days. I couldn’t resist with the beautiful patterned scrapbook paper that you can mix and match. Plus, using different shades of blue and red with patterned whites and on trend prints can have it be patriotic without being over the top.

How to Make Patriotic Pinwheels | www.rappsodyinrooms.com

I ended up doing very simple pinwheels but my friend Carrie from Dream Green DIY has a great tutorial on how she made her wedding day pinwheels that are larger and a bit (not much) more complicated.

1. Start with a 12 x 12 piece of scrapbook paper. Cut in half.

How to Make Patriotic Pinwheels | www.rappsodyinrooms.com

2. Fold each half into an accordion.

How to Make Patriotic Pinwheels | www.rappsodyinrooms.com

3. Staple in the middle and then fan out. Staple the two sides together to get the pinwheel look.

How to Make Patriotic Pinwheels | www.rappsodyinrooms.comHow to Make Patriotic Pinwheels | www.rappsodyinrooms.com

How to Make Patriotic Pinwheels | www.rappsodyinrooms.comHow to Make Patriotic Pinwheels | www.rappsodyinrooms.comHow to Make Patriotic Pinwheels | www.rappsodyinrooms.comHow to Make Patriotic Pinwheels | www.rappsodyinrooms.comHow to Make Patriotic Pinwheels | www.rappsodyinrooms.com

It’s that easy!  You can make any size you want with any color and pattern paper you want!

PS – You’ll want to check back later in the week with the tutorials on the other projects you see in these pictures!