Why hello my wonderful readers and any new friends that may be popping by from Simply Designing as we embark on a fun little last minute holiday crafting blog hop! My friend Jessica at Decor Adventures emailed a group of us bloggers asking if we wanted to join in on a little last minute Christmas crafting adventure. The challenge was to use what you already had to make something new for Christmas. I was so in! Christmas decor is so versatile and you can always reimagine it into new and beautiful decorations.
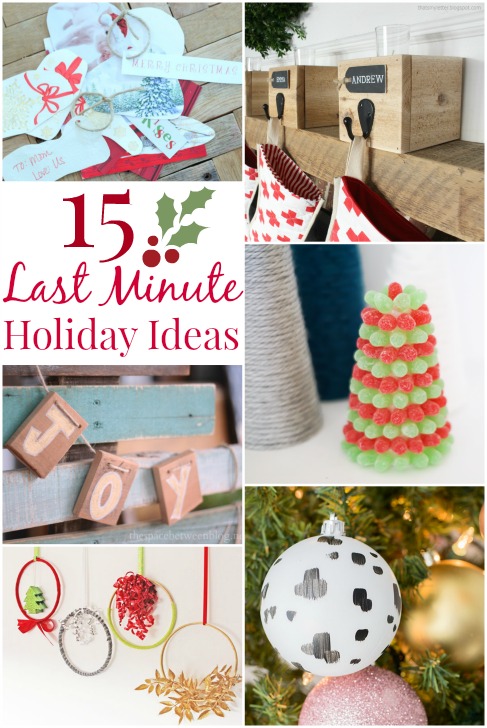
Last minute holiday ideas | www.rhapsodyinrooms.com

I took a jaunt around my apartment to see what I could wrangle up. I spied a pile of these knock-off golden orbs (whewww that post is back in the day too!) that I had made with embroidery hoops. They weren’t looking quite as good post-move but I knew I could do something fun and exciting with them for Christmas.
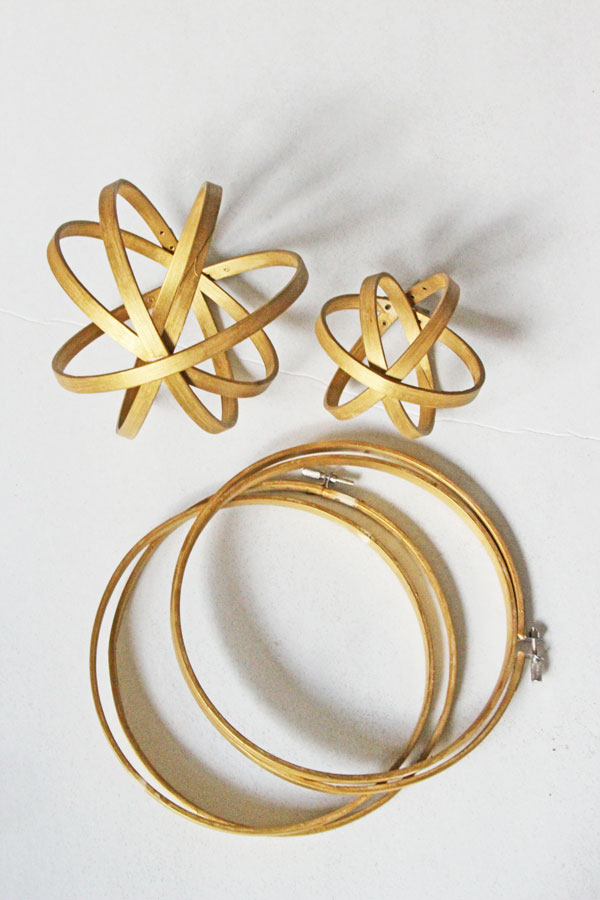
Embroidery Hoop Christmas Wreath Epicycles | www.rhapsodyinrooms.com

That’s when the real raid began. I knew I wanted to make them into mini-Christmas wreaths. I also knew that most anything could go on the wreaths. I basically pulled out all my crafting supplies and Christmas decor I hadn’t used yet and just began tinkering (kinda like an elf in Santa’s workshop, right?!).
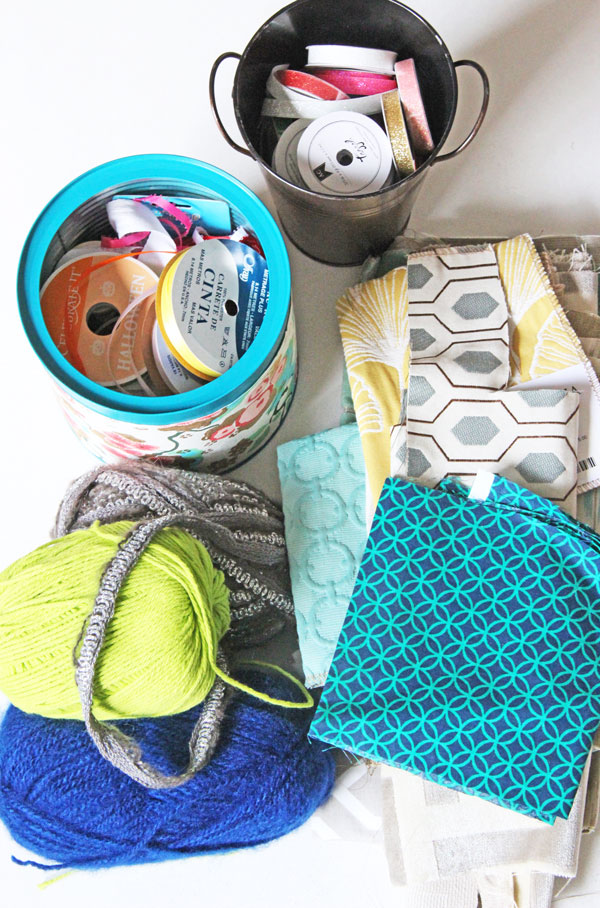
Embroidery Hoop Christmas Wreath Epicycles | www.rhapsodyinrooms.com

Here are the four different wreaths I made and what I used to make them:

Embroidery Hoop Christmas Wreath Epicycles | www.rhapsodyinrooms.com

Yarn Wrapped Embroidery Hoop Wreath

I did two of these in different variations. For the first one I took my fluffiest yarn (so sparkly and cozy – perfect for winter) and wrapped it around the hoop. I just tied it to the wreath when I started and stopped to secure it. Then I used some wrapping ribbon to make it fun and festive.

Embroidery Hoop Christmas Wreath Epicycles | www.rhapsodyinrooms.com

For the second yarn wrapped wreath I used the same method but I just wrapped part of the hoop. I wanted to show off the gold on the hoop and give it more of a color blocked look. I used some more ribbon to top this one off too. The curly cue ribbon is just so beautiful on these wreaths!

Embroidery Hoop Christmas Wreath Epicycles | www.rhapsodyinrooms.com

Ribbon Wrapped Embroidery Hoop Wreath

I raided my wrapping supplies (95% of which I have saved from presents given me so I don’t have to buy the stuff as much) again and found this pretty red ribbon. One side of it actually said Estee Lauder (haha, I seriously save everything) but I just flipped it over and wrapped it around the hoop. Then I finished it off (and secured it to the hoop) by making a bow. For a final touch I used a Christmas tree present box (that also serves as an ornament I guess since it had a loop attached to it) and hung it from the hoop.

Embroidery Hoop Christmas Wreath Epicycles | www.rhapsodyinrooms.com

Glitter Leaves Embroidery Hoop Wreath

This one took all of 5 seconds. I had a glitter leaves stalk that I’ve stuck in a vase for years and decided just bend it around the hoop. One bend and some leaf tweaking and I’m in gold glitter love. This one is so simple yet classy all at the same time. Win!

To finish them all off I once again used ribbon I had in my stash to loop around the hoops and hang them. I decided to make a little gallery of them on the wall but these could go anywhere: on a door, window, even on a tabletop! Maybe even hang them off cabinets! Endless opportunities.

Embroidery Hoop Christmas Wreath Epicycles | www.rhapsodyinrooms.com

Embroidery Hoop Christmas Wreath Epicycles | www.rhapsodyinrooms.com

Embroidery Hoop Christmas Wreath Epicycles | www.rhapsodyinrooms.com

Embroidery Hoop Christmas Wreath Epicycles | www.rhapsodyinrooms.com

Now let’s continue the blog hop to see what other awesome Christmas crafting has happened! Next stop is Decor and the Dog. Everything Michelle, Nate and Ike (the dog behind the decor) do is so gorgeous so if you haven’t checked out their blog yet make sure to take some time to peruse it now. So good.

To start the blog hop at the beginning so you don’t miss a single awesome project go to Decor Adventures and take it from the top!

Tuesday, Dec 9

Wednesday, December 10th:
Rappsody in Rooms | Decor and the Dog | Ciburbanity | Primitive & Proper

Today, December 11th:
Gourley Girl and Guy | Desert Domicile | Life on Virginia Street | This That and Life

Teaser alert: BLINGING gold glitter wreath tutorial coming up soon!

My Sparkly Christmas Tour | www.rhapsodyinrooms.com

Merry Christmas friends! Welcome to my ever so humble apartment Christmas tour! It’s actually been kind of amusing for me to decorate for Christmas when I still have a room of boxes waiting to be unpacked. Then, to bring in more boxes of Christmas stuff to try to squeeze into this just one month old apartment has been an interesting but fun challenge all at the same time.

I decided that this Christmas to me is all about simplicity, joy, and sparkle! I actually coined this Christmas theme “The Most Sparkliest Christmas Ever”. I just wanted it to be all about joy. Joy to me is sparkle so I let that abound! Joy to me at Christmas time is also letting things be relaxed, simple, and definitely not over decorated (at least this year). So this really is a simple Christmas this year. My head just couldn’t handle much more than simple this year.

My Sparkly Christmas Tour | www.rhapsodyinrooms.com

I kept the decorating to the main room with the focal point being the tree. But it’s just not any tree to me this year. It is a glittery, sparkly tree of gold, silver, and white. It makes me happy like no tree has ever made me happy before.

My Sparkly Christmas Tour | www.rhapsodyinrooms.com

I am actually going to devote a whole post to how I lit, ribboned, and bedazzled my tree this year because I picked up a few tips and tricks that I thought would be helpful to share!

My Sparkly Christmas Tour | www.rhapsodyinrooms.com

My Sparkly Christmas Tour | www.rhapsodyinrooms.com

I couldn’t help but bring in another tree that is oh-so-dear to my heart: my vintage, family heirloom ceramic tree. I love this tree so very much. It just brings warmth and love to my heart looking at it and remembering all the family Christmases it has seen. I also think it was looking quite pretty on my kitchen cart. The perfect place.

My Sparkly Christmas Tour | www.rhapsodyinrooms.com

My Sparkly Christmas Tour | www.rhapsodyinrooms.com

My Sparkly Christmas Tour | www.rhapsodyinrooms.com

Then it was time to sparkle up my table that already hosted a beautiful bouquet of flowers. I added my gold glittery pinecones and a brass stand filled with dark chocolate mint Hershey kisses (given to me by my Secret Santa in my stocking). I thought it added just the right touch of Christmas sparkle without cluttering up my space. Cause gosh darn, I am that person saying that sometimes Christmas decor just makes me feel cluttered.

My Sparkly Christmas Tour | www.rhapsodyinrooms.com

My Sparkly Christmas Tour | www.rhapsodyinrooms.com

Then, as a fun twist and part of the 12 Days of Christmas blogger tour, I had to incorporate the 9th day of Christmas: nine ladies dancing. Say what?

My original plan was to make a silly video of me dancing as I decorated for Christmas. But then who really wants to see that? So instead I kept my idea of simple Christmas decor by going black and white. I printed out nine black and white photos of iconic women and/or dances throughout history and hung them on the wall with green polka dot washi tape (cause green polka dots make it Christmas, right?). Add a little Christmas glam on the table underneath it, and I call that decorating for the Nine Ladies Dancing. Boom. Can I get a high kick for that?!

My Sparkly Christmas Tour | www.rhapsodyinrooms.com

My Sparkly Christmas Tour | www.rhapsodyinrooms.com

My Sparkly Christmas Tour | www.rhapsodyinrooms.com

I actually am really digging this washi tape black and white gallery wall. Adding things to your walls adds so much dimension to a room. It just feels different as I sit in here and write this blog post.

Oh yes, and I threw up some glittery ornaments for fun in a few of the shots. I also thought about stringing some garland and/or lights around it … but then I didn’t. But maybe you could?

My Sparkly Christmas Tour | www.rhapsodyinrooms.com

The pictures represent some of my favorite moments: the iconic Dirty Dancing scene, a beautiful shot from a dance scene in White Christmas, Princes Diana dancing in a gorgeous black gown, Audrey Hepburn being her glamorous self, my favorite artist Jack Vettriano, a classic photo of a woman (anyone know who she is?) with elephants, the Rockettes of course, Jackie Kennedy at her wedding, and a little bit of flappers just for fun.

Here’s a collage of the actual photos I used to show you a close-up.

Nine Ladies Dancing Collage | www.rhapsodyinrooms.com

Now that I am sure that I have intrigued you as to the 12 Days of Christmas decorating tour, why don’t you hop on over and check out more of these crazy twelve days?! Happy blog hopping!

MONDAY December 1st

{Partridge in a Pear Tree}

Simply Fresh Vintage Petticoat Junktion Snazzy Little Things

{Two Turtle Doves}

Confessions of a Serial Do-it-Yourselfer Fresh Idea Studio

TUESDAY December 2nd

Country Design Style DIO Home Improvements mommy is coocoo

{Four Calling Birds}

Artsy Chicks Rule Virginia Sweet Pea

WEDNESDAY DEC 3rd

{Five Golden Rings}

House on the Way DIY 180 Restoration Redoux

{Six Geese-a-Laying}

Postcards from the Ridge Farm Fresh Vintage Finds

THURSDAY December 4th

{Seven Swans a Swimming}

Curb Alert! Cupcakes and Crinoline

{Eight Maids a Milking}

Our Southern Home

FRIDAY December 5th

{Nine Ladies Dancing}

Better After Rhapsody in Rooms

{Ten Lords a Leaping}

The Endearing Home

SATURDAY December 6th

{Eleven Pipers Piping}

Refresh Restyle Lilacs and Longhorns Imparting Grace

{Twelve Drummers Drumming}

What Meegan Makes Mrs. Hines Class


Pssst: Make sure to come back soon for more glittery Christmas goodness. Sneak peek below!

My Sparkly Christmas Tour | www.rhapsodyinrooms.com

My Sparkly Christmas Tour | www.rhapsodyinrooms.com

Hi everyone! Hope you all had a wonderful Thanksgiving holiday full of family, happiness, and love – no matter what form that takes in your life! I was lucky enough to have my Dad come visit, and we had Thanksgiving at my apartment! Movies were watched, pies were baked, and laughs were had!

Now, I’m going to be turning all Christmas decor soon but before I get to that I thought I would first show you how my first furnished apartment tour and how it is shaping up a few weeks in (you can see it empty here). I’m definitely not promising perfectly styled shots and an all done apartment. Nope, that’s not my place at all right now. The big stuff is in and the boxes are only somewhat unpacked. But they are still there, biding their time for me to pay attention to them.

So let’s take a turn through the apartment and see where we’re at before it turns all sparkly and gold for Christmas (for real, I’m writing this staring at my Christmas tree and it will not let you down in the sparkly department).

The Living Room / Dining Room / Kitchen

This main room is definitely the most unpacked. Which makes sense since I live here 99% of the time. I still have lots of ideas for this room – like renter friendly artwork, wall treatments, and fun little styling. Oh yeah, and getting the box outta there and making the bookcase look presentable and not having a rug rolled in the corner. I am definitely wanting a rug for the main room too. Plus the table needs painting. Too much green in that corner and it has a huge rust stain. I’ll be back with more details about the color scheme I’m thinking about going with in here.

My New Apartment Tour - A Few Weeks In | www.rhapsodyinrooms.com

My New Apartment Tour - A Few Weeks In | www.rhapsodyinrooms.com

My New Apartment Tour - A Few Weeks In | www.rhapsodyinrooms.com

My New Apartment Tour - A Few Weeks In | www.rhapsodyinrooms.com

My New Apartment Tour - A Few Weeks In | www.rhapsodyinrooms.com

My New Apartment Tour - A Few Weeks In | www.rhapsodyinrooms.com

My New Apartment Tour - A Few Weeks In | www.rhapsodyinrooms.com

My New Apartment Tour - A Few Weeks In | www.rhapsodyinrooms.com

My New Apartment Tour - A Few Weeks In | www.rhapsodyinrooms.com

My New Apartment Tour - A Few Weeks In | www.rhapsodyinrooms.com

The Den / Studio

This place is  legit MESS. It’s where all the boxes go bide their time. But I have big plans for this place. I want it to be my studio for crafting, photo shoots for projects, and lots of other fun stuff. Right now it is just a pile with a styled bookcase. You have to start somewhere right?!

My New Apartment Tour - A Few Weeks In | www.rhapsodyinrooms.com

My New Apartment Tour - A Few Weeks In | www.rhapsodyinrooms.com

My New Apartment Tour - A Few Weeks In | www.rhapsodyinrooms.com

My New Apartment Tour - A Few Weeks In | www.rhapsodyinrooms.com

My New Apartment Tour - A Few Weeks In | www.rhapsodyinrooms.com

My New Apartment Tour - A Few Weeks In | www.rhapsodyinrooms.com

My New Apartment Tour - A Few Weeks In | www.rhapsodyinrooms.com

The Bathroom

Not a lot to say about this place. You do what you do. I made a few pretty vignettes in this small space but there is a lot of storage organization that needs to go down in here.

My New Apartment Tour - A Few Weeks In | www.rhapsodyinrooms.com

My New Apartment Tour - A Few Weeks In | www.rhapsodyinrooms.com

My New Apartment Tour - A Few Weeks In | www.rhapsodyinrooms.com

The Bedroom

This room is screaming for something on the walls, don’t you think? I do! But the morning light that comes in here is magical and my window has a pretty view outside of trees (not a parking lot like my other windows)! I love this room though. It is so cozy and has plenty of storage for my clothes which is a first for me in quite a long time! I also am digging how my herringbone rug and duvet cover pattern really jive together. One of my best mixing patterns to date!

My New Apartment Tour - A Few Weeks In | www.rhapsodyinrooms.com

My New Apartment Tour - A Few Weeks In | www.rhapsodyinrooms.com

My New Apartment Tour - A Few Weeks In | www.rhapsodyinrooms.com

My New Apartment Tour - A Few Weeks In | www.rhapsodyinrooms.com

My New Apartment Tour - A Few Weeks In | www.rhapsodyinrooms.com

My New Apartment Tour - A Few Weeks In | www.rhapsodyinrooms.com

My New Apartment Tour - A Few Weeks In | www.rhapsodyinrooms.com

The Laundry Room / Utility Closet

It houses a major Craigslist score of a washer and dryer that are practically brand new but it also houses a big fat mess on the shelves. But hey – it’s storage and it will be organized eventually. Oh yeah. and it’s a place for my exercise ball to hang out. Win.

My New Apartment Tour - A Few Weeks In | www.rhapsodyinrooms.com

Well folks, that’s the grand tour! Hope you liked this peek into this little place I call home. I love every square foot. Can’t wait to share my further adventures in it!

  • carol

    Seriously so adorable. Love everything. Your kitchen has more cabinets then my home. Enjoy it. It’s lovely.ReplyCancel

    • Thank you so much!! Isn’t the kitchen amazing for an apartment?!ReplyCancel

  • Tammy

    Megan….I love your apt. It’s cozy…..warm….and inviting:) you will get it all figured out…..and I love your kitchen….so cute:) it looks like a spacious apt..and you even have a washer and dryer….that’s awesome….I love too decorate….it’s my passion….and your doing a Great job…..Thank you for sharing your pics…..I’d love too see the end results…..very cute apt:)ReplyCancel

    • Thank you so much! It is a fun process for sure! Love my kitchen and washer and dryer! 🙂ReplyCancel

Let the Christmas season begin! Or at least let it begin here on Rhapsody in Rooms since clearly Christmas has begun everywhere else come November 1st (I would especially like to thank Hallmark Channel for starting your Christmas movies that early).

I am so excited to start the Christmas festivities here with a very special blogger Secret Santa tour. A group of my blogger friends and I all got together and decided to do a DIY Christmas Secret Santa. That means I made a fun Christmas craft for my friend Jeanette at Country Design Style and my friend Nancy from Artsy Chicks Rule made one for me!

Bloggers Secret Santa: DIY Lighting Christmas Canvas | www.rhapsodyinrooms.com

Let’s begin with showing you the Christmas craft I made Jeanette: a lighted Christmas canvas. [Thank you to Bubbly Nature Creations for the inspiration!] It is so easy to make but adds such a nice sparkle to Christmas decor!

Bloggers Secret Santa: DIY Lighting Christmas Canvas | www.rhapsodyinrooms.comLighted-Christmas-Canvas-11


 Supplies

*Designates affiliate links

Bloggers Secret Santa: DIY Lighting Christmas Canvas | www.rhapsodyinrooms.com

Directions

1. Pick your message (using either stencil or stickers) and decide placement on your canvas. I went classically centered.

Bloggers Secret Santa: DIY Lighting Christmas Canvas | www.rhapsodyinrooms.com

2. Using your silver Sharpie draw snowflakes of various sizes all over your canvas. I started by drawing the dots for placement first and then finished up with the full snowflake. Really fill up the canvas to make it seem oh so snowy and sparkly! I tried to make one hundred snow flakes to fit my one hundred mini lights. However, I wasn’t able to use all my snowflakes with lights because they were too close to the wooden frame so add more snowflakes if you want to use all the lights.

Bloggers Secret Santa: DIY Lighting Christmas Canvas | www.rhapsodyinrooms.com

Bloggers Secret Santa: DIY Lighting Christmas Canvas | www.rhapsodyinrooms.com

Bloggers Secret Santa: DIY Lighting Christmas Canvas | www.rhapsodyinrooms.com

3. Use your sharp object (I used scissors) to make a small hole in the center of the snow flake.

Bloggers Secret Santa: DIY Lighting Christmas Canvas | www.rhapsodyinrooms.com

4. Push your lights through the holes. If you made any holes too big you can use a dab of hot glue to secure the light in place.

Bloggers Secret Santa: DIY Lighting Christmas Canvas | www.rhapsodyinrooms.com

5. Plug it in and you’re done!

Bloggers Secret Santa: DIY Lighting Christmas Canvas | www.rhapsodyinrooms.com

Bloggers Secret Santa: DIY Lighting Christmas Canvas | www.rhapsodyinrooms.comLighted-Christmas-Canvas-11Bloggers Secret Santa: DIY Lighting Christmas Canvas | www.rhapsodyinrooms.com

Bloggers Secret Santa: DIY Lighting Christmas Canvas | www.rhapsodyinrooms.com

Bloggers Secret Santa: DIY Lighting Christmas Canvas | www.rhapsodyinrooms.com

Now, to show you Nancy’s craft she sent me! I LOVE it so much! It is a naughty/nice stocking with jingle bells. Plus, she stuffed it with chocolate goodies and you know that it is the key to my heart!

I

I

For even more fun DIY Christmas crafts and to see what all my blogger friends sent each other visit all their sites for beautiful Christmas decor and inspiration!


  • Cute idea for a canvas! This is such a fun blog hop that you guys are doing. Off to see what everyone else made and received.ReplyCancel

    • Thanks so much Marie! I’ve had so much fun with this blog hop!ReplyCancel

  • Love your Believe lighted canvas!! Very clever!!! It’s so pretty…and I’m glad you like your stocking!! 🙂

    NancyReplyCancel

    • Nancy – I LOVE my stocking!! I really needed one too so it came at a perfect time! Thank you so much!!ReplyCancel

  • What a beautiful and creative way to celebrate, Megan. VERY impressive.I love this idea! Pinning.
    What a great blog tour!ReplyCancel

    • Thank you so much, Meegan! I love anything that adds more sparkle any time of year but especially at Christmas. I love this tour too!ReplyCancel

  • This is a great project Megan! I am going to give this a try. Thanks so much.ReplyCancel

    • Thank you, Vanessa! It’s so easy too! I did it while watching a Christmas movie which made it extra fun!ReplyCancel

  • I love love love this, Megan!! It might just be my favorite. 😉ReplyCancel

  • What a great idea for a craft. I love the lights and bet that it looks so pretty at night lit up.ReplyCancel

    • Thank you, Paula! I love Christmas lights at night. They are so cozy! I am seriously thinking of making one for myself!ReplyCancel

  • Megan, I can’t even begin to tell you how much I L~O~V~E the believe sign! We have family visiting and had a blast adding it to the mantel. We were trying to figure out how you did the snowflakes. Some guessed stenciled and some hand drawn. It’s such a treasured piece for our home for many years to come. Thank you so very much. Wishing you a wonderful holiday. Your friend Jeanette.ReplyCancel

    • Oh Jeanette you just made me weepy over here! Thank you so much for your kind words! It makes me so happy to hear how you were able to make it part of your mantel. And the snowflakes were all hand drawn. All it took was one Christmas movie to draw them! It was fun! Yay! Sending you lots of Christmas love!ReplyCancel

  • Love it! It’s so clever and too cute for words! Have a Happy Thanksgiving!
    LeslieReplyCancel

  • This is gorgeous Megan! I bet it so pretty to light up esp at night! You did an amazing job 🙂ReplyCancel

  • Jill

    I LOVE this!! You know how I love snowflakes, I might have to make one of these.ReplyCancel

    • Yay! You should Jill! It’s so easy and a fun craft to make in front of a Christmas movie!!ReplyCancel

  • […] For step by step instructions please click here […]ReplyCancel

  • gail mckenzie

    I love love love this! I love it so much I had a go at making one and putting it up in my living room, it has pride of place. I took a picture to show all my friends on facebook, big mistake, now they want me to make them for all them too!
    Thanks again, and your lighted canvas will be adorning living rooms throughout Wales, UK soon ha ha 🙂 xxxReplyCancel

    • Yay!! I’m so excited to hear this! How fun! You should suggest a crafting party where you can teach everyone to make them!ReplyCancel

  • Rachel

    Very cool. I’m making these for my cousins this year. One question though, did you discover a particularly good way to secure the lights so that they don’t pop out? Mine keep falling out.I cod just use duct tape, but there may be a better solution.ReplyCancel

  • […] Lighted Christmas Canvas – Rhapsody in Rooms […]ReplyCancel

  • MARIA SOTO

    very pretty canvas project!ReplyCancel

  • Ranking

    what size is the wood pieces on the back and how did you secure them to the board? BEAUTIFUL!!!ReplyCancel

    • I actually bought the canvas at the craft store so it was all ready to go – no assembly necessary! Makes it very simple!ReplyCancel

  • Peggy Barnacastle

    I want to make these for my camping club ladies for Christmas gifts next year. Yeah give me a challenge for a whole year. Thank you so muchReplyCancel

    • That’s such a great idea! Start early since they are a little time consuming!ReplyCancel

  • I just happened to see this on Hometalk this morning and wanted to tell you that I plan to make my own for this year for my shop. In fact, I think that I’ll make several!ReplyCancel

    • That’s awesome! Start early. They are fun to make but time consuming!ReplyCancel

  • […] Great Christmas decor project! Want to make one? Check out the tutorial via Rhapsody in rooms. […]ReplyCancel

  • […] If you like your snowflakes to twinkle then this is the art work for you. An easy DIY project that will make your lounge room sparkle with Christmas cheer. (via Rhapsody in Rooms) […]ReplyCancel

  • Jennifer Jeschke

    how did you get the sticker to stick??ReplyCancel

    • Mine went on easily and stuck really well. If yours isn’t sticking maybe your canvas is too rough? Or not a good quality sticker? If not, I bet some glue would work well!ReplyCancel

When going through a difficult time or a big change in your life (ahem separation) it can make you reevaluate everything in your life. Case in point: me.

After Eric told me that he wanted a separation my world crumbled. Everything in the past, present, and future seemed to have question marks surrounding it. Everything I had been living and thinking and understanding in the past seemed like it could be a lie, a dream, unreality. Everything in the present was all pain and fuzziness. My future had disintegrated before my eyes.

That’s enough to make a person question everything they thought they knew about themselves. I began to question everything in my life, even firmly rooted beliefs I had. Because when your life is completely uprooted you get to decide what you plant again. You get to reorganize, choose again, throw stuff out, think more critically before replanting.

So that’s what I did. Here’s where I get honest.

I don’t drink. Never have (except that egg nog Dad – I won’t forget that). 😉

I have very conservative morals.

I am very quirky with an oddball sense of humor.

I don’t do surface level things. I like to dive deep.

These are all things I identified strongly with. I loved these things about myself. They made me me, and I was proud of that.

Then I wasn’t. I thought, “Maybe I can just try being normal. Make mistakes. Have a drink. Have looser morals. Make decisions that will make me fit in easier. Maybe even try to be someone I’m not a little bit to make men like me more.”

Learning to value your you-ness | www.rhapsodyinrooms.com

Yes, it may sound dumb to you. You may not understand where I’m coming from. But when you are thrown into a pit of self-doubt and the person who you thought loved you unconditionally, because and for your quirks, says that he can’t do that anymore, it makes you doubt who you really are. If you’re good enough. If you’re attractive enough. If people even like you. If you even like you. It makes you think, “Maybe I can change to be more likable. Because apparently I wasn’t enough before. Then I will feel better about myself.”

It’s so darn tempting at this stage.

I want to be liked. But even further than that, I want to be loved.


Learning to value your you-ness | www.rhapsodyinrooms.com

Yes, friends and family, you are rocking my world in a million and one ways. But everyone wants to have someone special. No one wants to feel lonely. Everyone wants to be loved (and that’s important to remember).

But then that comes full circle. Because to be loved, truly loved in the way that is most beneficial, rewarding, and healthy is to first love yourself. To love yourself so hard that you don’t need someone else to validate your being. That you are 100% you, for you and only you. To remember to embrace all those things that make you you. To love your quirks, yours morals, what makes you different.

Learning to value your you-ness | www.rhapsodyinrooms.com

Because face it, those are the best parts of you. Trying to be someone who everyone likes or who you think everyone likes is living a lie. It’s being fake. It’s being dishonest. People see through it. It’s also not fun, rewarding, or helpful to the world at large.

I think we’ve all heard it before, but there is only one you. What makes you special is YOU.

Learning to value your you-ness | www.rhapsodyinrooms.com

So this is my little moment of clarity. My lightbulb and a-ha moment. A late twenties reminder that I believe I realized in my early twenties and probably at times in my teens as well (funny how we have to keep relearning the same lessons sometimes, huh?).

Don’t shy away from what makes you special, unique, and you.

Learning to value your you-ness | www.rhapsodyinrooms.com

Yes, everyone may not appreciate you just like you are, but the important ones will. It’s so much more rewarding and fulfilling. Plus, learning this now will save lots of pain, digression, and cleaning up your mistakes in the future.

Learning to value your you-ness | www.rhapsodyinrooms.com

It’s also okay, and kind of awesome, to have such a drastic life change that makes you examine your life down to every last detail. It’s okay to change. It’s actually good to change and reevaluate. But what I’ve learned is that change because you want to change. Change because it is what’s best for you. Change for you and for no one else. Embrace yourself more, not less. Because it’s these big, crazy, hard life circumstances that make us even better, stronger people. Ready to embrace this world with a bigger heart. Ready to turn outward into the world and take it on. Because no one is better to take on this world than you are. Just the way you are.

Learning to value your you-ness | www.rhapsodyinrooms.com

  • You are special and awesome as you are. He is the one who losing out on a gem!ReplyCancel

  • Candy Walsh

    Megan~that was a very brave and important step you just took in your journey of moving on. How awesome that you had the guts to lay it all out there. Just remember, God made you in your own uniqueness, not to be changed for anyone else or for any reason. Your purpose and your path in life were set long before you even met your husband, so just keep doing what you do, stick to morals and values and you’ll get through all of this, and who knows, it might turn into an adventure after the pain wears off. As a follower of your blog, I wish you well and will keep you in my prayers!ReplyCancel

    • Candy – thank you so much for your comment! It means the world to me! And such wise words in it. I agree with every one of them!! Thank you!ReplyCancel